Trickle vent installation cost is one of the most common questions homeowners ask when facing a window replacement project or a building compliance notice. Yet finding a straight answer is surprisingly difficult. Most search results lead to companies selling installation services, where pricing is buried behind "request a quote" buttons. This guide takes an editorially independent approach, breaking down per-unit costs, per-window costs, whole-property costs, the factors that shift the price, and the scenarios where trickle vents may not even be your most cost-effective option.
But before diving into the numbers, you need to understand what you're actually paying for and why the expense is rarely optional.
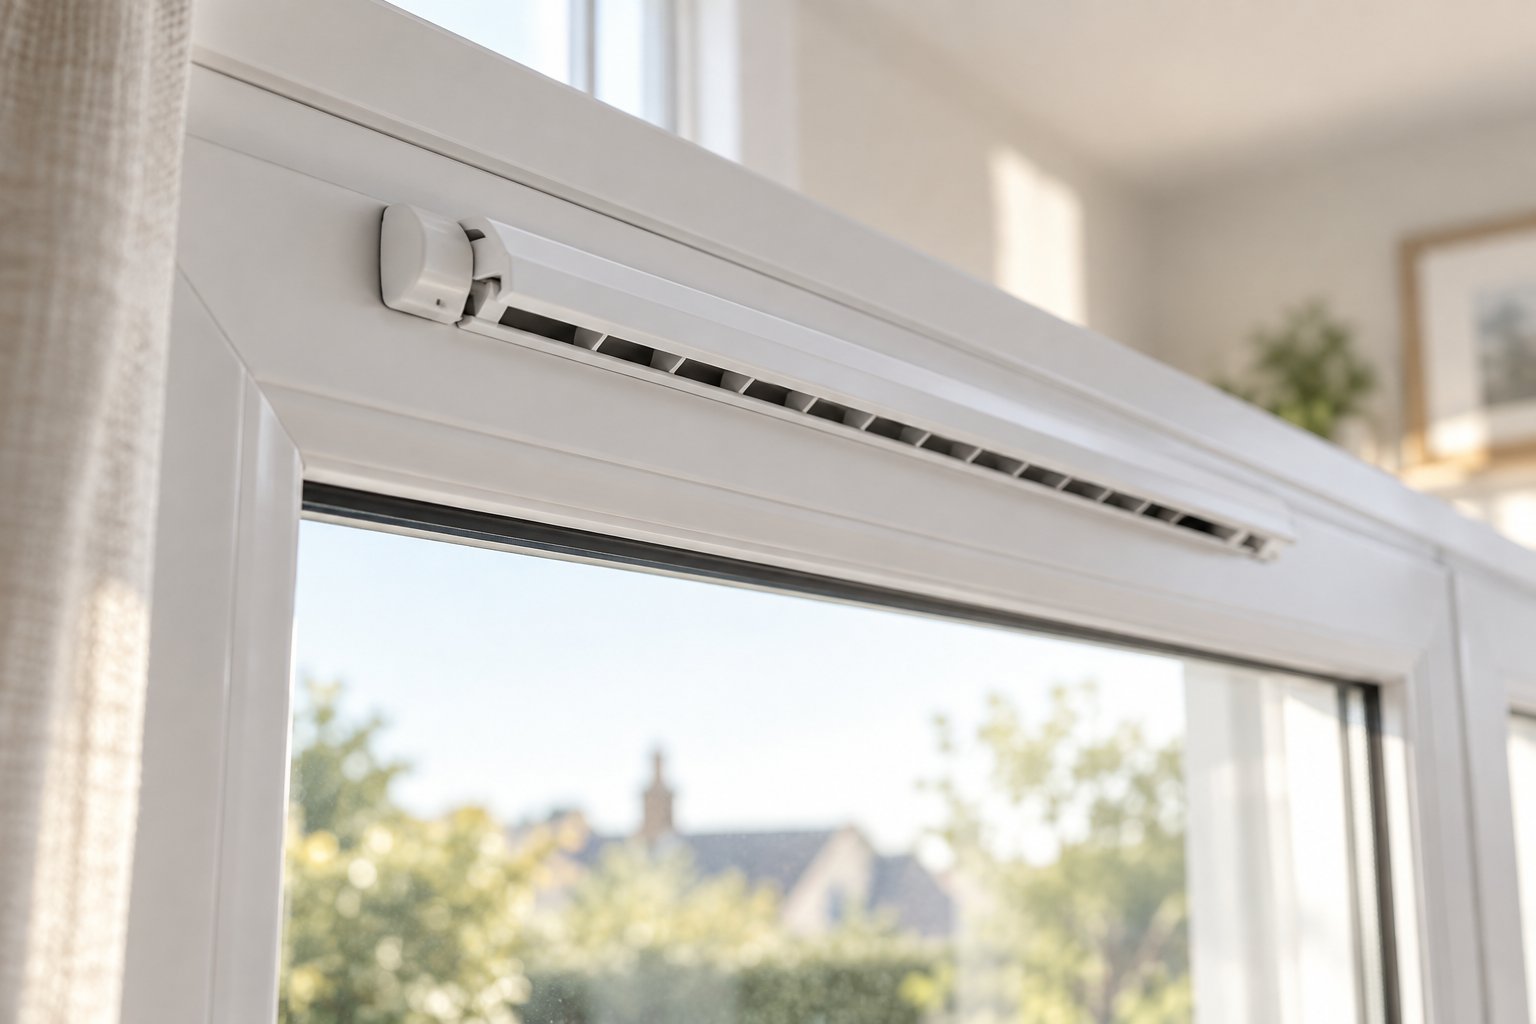
A trickle vent is a small, openable ventilation slot built into the head of a window or door frame. Think of it as a narrow, purpose-designed opening that allows a controlled trickle of fresh air into your home without the security risks, noise, or weather exposure that come with leaving a window ajar. You can open or close the vent manually depending on your needs. When open, it provides continuous low-level background airflow, helping moisture and indoor pollutants escape. When closed, it seals flush with the frame.
These vents are not large gaps. They are precision-engineered to deliver a specific volume of airflow, measured in equivalent area (EA) rated in mm². Common sizes range from 2,000mm² EA for small bathrooms up to 8,000mm² EA for habitable rooms like bedrooms, living rooms, and kitchens. The higher the EA rating, the more airflow a single vent provides.
Here's where the cost question gets urgent. Installing trickle vents is not just a comfort upgrade or a nice-to-have feature. Since June 2022, Part F of the Building Regulations in England requires that almost all replacement windows and doors include adequate background ventilation. Modern homes are more airtight than ever, and without proper ventilation, condensation, mould, and poor indoor air quality become serious risks. The regulations mandate specific equivalent area targets for each room type, and trickle vents are the most common way to meet them.
This regulatory requirement changes how you should think about the cost of installing trickle vents. It is not a discretionary spend you can skip to save money. In fact, the UK Government's own FAQ on the topic makes the position clear: a homeowner cannot sign a disclaimer refusing vents, and an indemnity policy is not a suitable alternative to meeting the requirements in full.
Trickle vents are a regulatory requirement under Building Regulations Part F, not an optional upgrade. Any quote for replacement windows should include compliant ventilation as standard, and the real question is not whether to install them but how to manage the cost intelligently.
That shifts the conversation from "should I pay for this?" to "how do I make sure I'm not overpaying?" The answer depends on several variables, from your window frame material and property size to whether vents are being factory-fitted into new windows or retrofitted into existing ones.
Several variables determine how much you'll actually pay for trickle vent installation, and no two properties produce the same final figure. The problem is that most quotes present a single lump sum without explaining which factors drove the price. Understanding these variables gives you the leverage to question a quote intelligently and spot where costs may be inflated.
Here are the primary factors that shape the total expense:
Each of these deserves a closer look, because even small differences in one area can produce a noticeable swing in your overall project cost.
The single biggest driver of total cost is simply how many vents your property needs. Part F calculations determine this based on room type, room size, and the dwelling's overall ventilation requirements. According to guidance aligned with Approved Document F, the minimum number of ventilators installed across habitable rooms and kitchens should be at least four for a one-bedroom dwelling and at least five for properties with more than one bedroom. In practice, larger homes with multiple habitable rooms often require significantly more.
Each room type carries a minimum equivalent area target. Kitchens, bathrooms, and utility rooms have specific EA thresholds, while habitable rooms like bedrooms and living areas have their own. If your home has an open-plan kitchen and living space, you'll typically need at least three ventilators within that combined area, each meeting the EA requirement for habitable rooms.
Here's where the maths gets interesting from a cost perspective. Higher-rated vents — those with a larger equivalent area per unit — deliver more airflow through a single opening. Choosing a vent rated at 5,000mm² EA instead of one rated at 2,500mm² EA could halve the number of units you need for a given room. Fewer vents means fewer cuts, less labour, and a lower total bill. The per-unit cost of a higher-EA vent is greater, but the reduction in total vent count often makes it the more economical choice across a whole property. Always ask your installer whether the quote uses the most efficient EA combination or simply defaults to the cheapest individual vent.
Your window frame material directly affects how difficult — and therefore how expensive — it is to install trickle vents. The differences are not trivial.
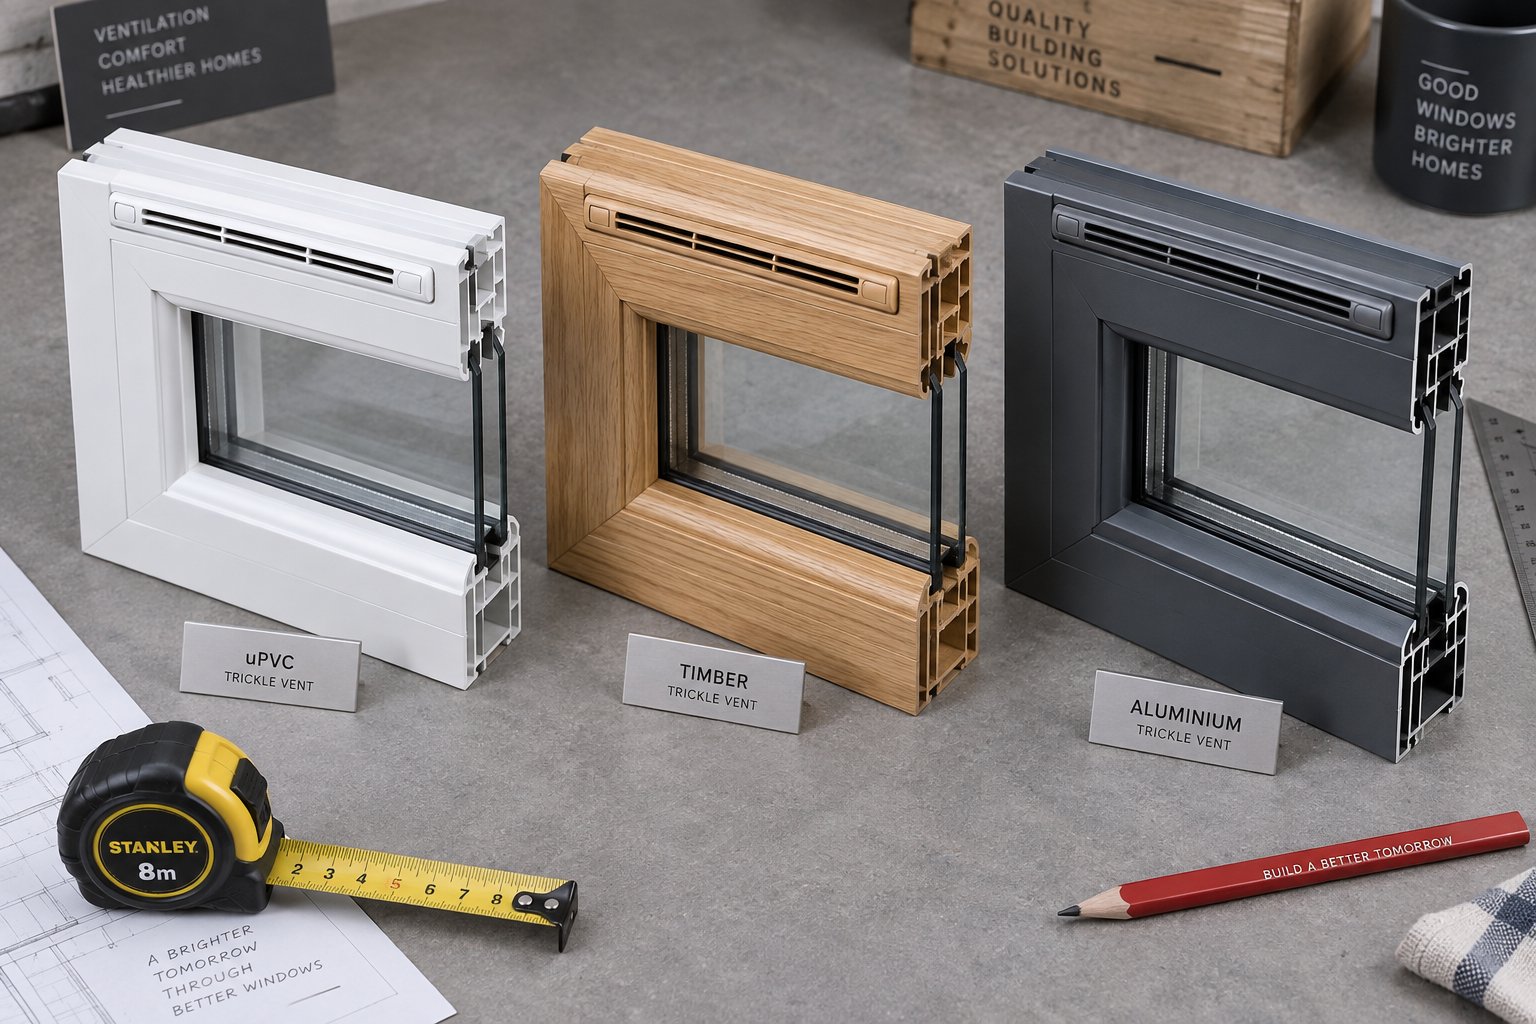
uPVC frames are generally the easiest and most affordable to work with. Installing trickle vents in uPVC windows involves cutting a slot through the plastic profile, which most installers can do quickly with a router or oscillating tool. The critical step is identifying the position of internal steel reinforcement within the profile — cutting into reinforcement can compromise the frame's structural integrity. But when the reinforcement position is properly checked beforehand, uPVC retrofits are straightforward. If you're looking to install trickle vents in uPVC windows on a budget, this is the most cost-friendly scenario.
Timber frames require more careful routing. The wood itself is easy enough to cut, but achieving a clean finish without splintering demands precision and experience, especially on hardwood or painted frames. After cutting, the exposed timber needs sealing to prevent moisture absorption and rot. Timber work also tends to require additional making-good — filling, sanding, and repainting around the vent — which adds both time and cost.
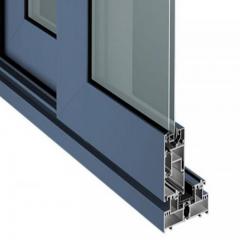
Aluminium frames sit at the top of the difficulty scale. These profiles are often slimmer than uPVC or timber, and they contain thermal break material that must not be compromised during cutting. Specialist cutting tools and knowledge of the specific profile system are essential. As one retrofit specialist notes, aluminium frames are frequently described as "too slim" for vents, though the limitation is usually a design choice rather than an absolute barrier. Still, the specialist expertise required means labour rates for aluminium trickle vent installation tend to run noticeably higher than for the other two materials.
Accessibility compounds these material differences. Ground-floor windows are simple to reach. Upper-floor installations may require a ladder for two-storey properties or full scaffold hire for anything above that. Scaffold costs are typically charged as a separate line item and can add a significant flat fee to the project, regardless of how many vents are being fitted on those upper floors. If your property requires scaffold access for only one or two windows, the per-vent cost at height becomes disproportionately expensive compared to ground-level work.
Regional labour rates layer on yet another variable. An installer in central London may charge substantially more per hour than one in the Midlands or North of England for identical work. While specific figures fluctuate with market conditions, it is worth collecting quotes from multiple local installers to benchmark your area — the spread between the cheapest and most expensive can be surprisingly wide.
These material and accessibility factors rarely appear as separate line items on a quote, which is exactly why understanding them matters. They are baked into the labour charge, and knowing what drives that charge puts you in a stronger position to evaluate whether a quote is fair — or padded.
Knowing which factors influence the price is useful. Seeing the actual numbers laid out in front of you is far more useful. The challenge with trickle vent window installation pricing is that most quotes arrive as a single figure with no breakdown, making it nearly impossible to tell whether you're paying a fair rate or subsidising someone's overhead. The tables below pull together indicative cost ranges based on trade pricing data and real-world installation scenarios to give you a structured reference point.
Treat these figures as a benchmarking tool, not a fixed price list. Your actual costs will depend on the specific factors covered in the previous section — regional labour rates, accessibility, property age, and whether you're retrofitting or ordering new frames. But having a clear range for each material type lets you spot a quote that falls suspiciously above or below the norm.
Frame material is one of the strongest predictors of what you'll pay per vent. The vent units themselves are relatively inexpensive across all materials, but the labour required to cut, fit, and seal each one varies considerably. A uPVC trickle vent installation is typically the quickest job on an installer's list, while aluminium demands specialist tools and more careful handling of thermal break profiles.
The table below separates the vent supply cost from the labour charge so you can see exactly where your money goes. These ranges reflect professional installation — DIY costs are covered separately later in this guide.
| Window Frame Material | Typical Vent Unit Cost Range | Typical Installation Labour Cost Per Vent | Estimated Total Per-Vent Installed Cost |
|---|---|---|---|
| uPVC | £15 - £40 | £40 - £70 | £55 - £110 |
| Timber | £20 - £50 | £50 - £85 | £70 - £135 |
| Aluminium | £30 - £80 | £60 - £100 | £90 - £180 |
A few things stand out here. The vent unit itself is rarely the expensive part — even for aluminium frames, the component typically costs under £80. Labour is what drives the total. uPVC frames can be routed and fitted relatively quickly, often within 20 to 30 minutes per vent, which keeps the labour charge at the lower end. Timber takes longer because of the need for clean routing, edge sealing, and sometimes touch-up painting. Aluminium sits at the top because installers must work carefully around thermal breaks and use metal-specific cutting equipment.
Notice the spread in the aluminium row. That wide range reflects the variation between straightforward modern profiles and more complex or older systems where the installer needs to verify the profile cross-section before committing to a cut. If your aluminium windows have an unusual profile, expect the quote to trend toward the upper end.
Automatic humidity-controlled vents push the unit cost higher — typically £70 to £120 per vent — but they adjust airflow automatically based on indoor moisture levels. For kitchens and bathrooms, the extra spend can reduce condensation problems without requiring you to manually adjust the vent throughout the day.
Frame material is only half of the pricing equation. The style of window you're fitting vents into matters just as much, because different designs present different installation challenges. Imagine trying to fit a vent into the slim meeting rail of a traditional sash window versus the wide head section of a standard casement — the labour time and complexity are worlds apart.
This second table captures how window trickle vent installation costs shift depending on the window type. The figures assume professional fitting and include both supply and labour.
| Window Style | Estimated Installed Cost Per Vent | Installation Notes |
|---|---|---|
| Casement | £55 - £120 | Most straightforward installation; vent fits into the frame head with clear access and ample space in most profiles |
| Sash (Vertical Sliding) | £80 - £150 | Slimmer meeting rails limit placement options; may require over-frame vents or glazed-in solutions on period profiles |
| Tilt-and-Turn | £75 - £140 | Vent must avoid complex turn-and-tilt hardware; installation restricted to the fixed outer frame section |
| Skylight / Roof Window | £100 - £200+ | Access challenges increase labour significantly; scaffold or internal tower access often required; weatherproofing is critical on inclined frames |
Casement windows consistently deliver the lowest per-vent costs because they offer the widest, most accessible frame heads and the fewest hardware obstructions. This is the scenario where most published price guides draw their figures, so if your home has a mix of window styles, be cautious about applying a casement-based quote to every opening.
Sash windows bring a premium because their slim profiles often can't accommodate standard through-frame vents. Installers may need to fit over-frame units that sit above the upper sash or, in some heritage applications, use glazed-in vents integrated into the sealed unit. Either approach adds time and material cost. If you're wondering how to install trickle vents in wooden windows with a traditional sash design, this is one of the scenarios where professional assessment is strongly recommended before committing to a method.
Tilt-and-turn windows fall in the middle. The fixed outer frame usually has enough depth for a through-frame vent, but the installer must position it carefully to avoid interfering with the pivot and locking hardware that enables both tilt and turn functions. Any miscalculation here can compromise the window's operation — a costly mistake to correct.
Skylights and roof windows sit at the expensive end for a simple reason: access. Working on an inclined or overhead frame takes longer, often requires internal scaffold towers or platform access, and demands meticulous weatherproofing since the vent sits in a surface exposed to direct rainfall. The vent unit itself may cost no more than a standard casement vent, but the labour and access charges can easily double the installed price.
These tables are indicative guides based on current trade pricing, not fixed quotes. Always request an itemised breakdown from your installer that separates vent supply, labour, and any access or making-good charges so you can compare like for like.
With a clear picture of what each material and window style typically costs, the next logical question is whether those numbers change when vents are fitted as part of a new window order versus cut into frames you already have.
The cost tables in the previous section tell you what a single vent typically costs to supply and fit. But there's a much bigger cost question lurking underneath those per-vent figures: are you adding vents to brand-new replacement windows, or are you retrofitting them into windows you already have? The answer can shift your total project spend dramatically, sometimes by hundreds of pounds across a whole property. And yet, most quotes never explain which scenario they're pricing.
Can you install trickle vents into existing windows? In nearly all cases, yes. Should you? That depends on whether the cost premium of retrofit makes financial sense compared to factory-fitted alternatives. Here's how the two routes actually compare.
If your windows are already due for replacement, this is the most cost-effective path to compliant ventilation — and it isn't close. New replacement windows ordered to meet Part F requirements arrive with vent slots factory-cut into the frame head, and in many cases, the trickle vent units themselves are pre-fitted at the manufacturing stage. The precision is better, the weatherproofing is more reliable, and the cost uplift over a window without vents is minimal.
How minimal? In most cases, adding factory-fitted trickle vents to a new window order adds somewhere between £10 and £30 per window to the overall unit price. Compare that to the £55-£180 per-vent retrofit costs outlined earlier, and the economics are stark. The reason is simple: factory cutting uses CNC-controlled machinery that routes the slot in seconds, with zero risk of damaging a sealed unit or breaching reinforcement. There's no on-site labour, no specialist tooling, no scaffold hire, and no making-good work afterward.
The key takeaway for homeowners planning a window replacement project is straightforward. If a window company quotes you for new windows without trickle vents and then lists ventilation as a separate add-on at a premium, question it. Compliant ventilation should be built into the window specification from the start, not bolted on as an upsell. The marginal factory cost is a fraction of the retrofit alternative.
The retrofit scenario is fundamentally different — and more expensive. Imagine you've got perfectly serviceable double-glazed windows with years of life left in them, but you need to improve ventilation to address condensation, comply with a landlord obligation, or satisfy building control after related work elsewhere in the property. Installing trickle vents in existing windows means an installer physically cutting into the frame on-site, in your home, with all the variables and risks that entails.
The cost premium comes from several places at once:
According to trade pricing data from Future Glass & Windows, homeowners can expect to pay around £40 to £120 per vent for slimline through-frame retrofits, while glazed-in vents — where the sealed unit is replaced with a shorter one to accommodate the vent within the glass area — run between £120 and £300+ per vent. Add the minimum trip charge and any access costs, and a five-window retrofit project can easily reach £400 to £800 or more.
Feasibility is the other critical factor. Not all existing frames can safely accept trickle vents. Slimline aluminium profiles may lack the depth for a through-frame cut. Older uPVC windows may have reinforcement positioned exactly where the slot needs to go. Timber frames with decorative mouldings or heritage significance may be unsuitable for visible cutting. In these situations, glazed-in vents offer a proven alternative — the existing sealed unit is removed, a new unit manufactured approximately 45mm shorter is installed, and the vent clips into the freed space above. This approach avoids cutting the frame entirely, but the bespoke glass sizing drives the higher per-vent price.
A professional site assessment before committing to any method is strongly recommended. An experienced installer will check frame material, reinforcement positions, head height clearance, and thermal break profiles before confirming which retrofit approach is viable. Skipping this step risks paying for an installation method that turns out to be unsuitable midway through the job — a situation that invariably costs more to resolve than the assessment itself.
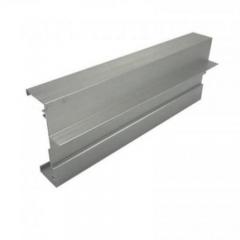
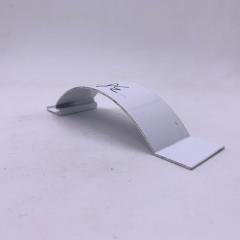
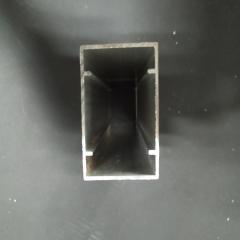
For contractors and fabricators handling retrofit projects, one of the persistent headaches is sourcing vents that actually fit specific frame profiles. Standard off-the-shelf trickle vents are designed around common profile dimensions, but aluminium systems in particular vary widely between manufacturers. A vent that integrates cleanly with one profile system may not seat correctly in another, creating weatherproofing problems and aesthetic compromises. Suppliers like Shengxin Aluminium offer custom window trickle vents engineered for specific frame profiles, which can simplify the retrofit process for trade professionals working with non-standard or bespoke aluminium window systems. Where frame-specific integration matters — particularly on higher-value residential or commercial projects — custom-sized vents reduce the risk of fit issues that lead to callbacks and rework.
Factory-fitted vents on new windows add roughly £10-£30 per unit. Retrofitting into existing frames costs £40-£300+ per vent depending on the method. If your windows are nearing the end of their lifespan, replacement with factory-fitted vents is almost always the more economical route.
Whether you choose retrofit or replacement, the per-vent cost only tells part of the story. Understanding exactly what happens during the installation process — and what you're actually paying an installer to do — reveals why the labour charge often dwarfs the cost of the vent unit itself.
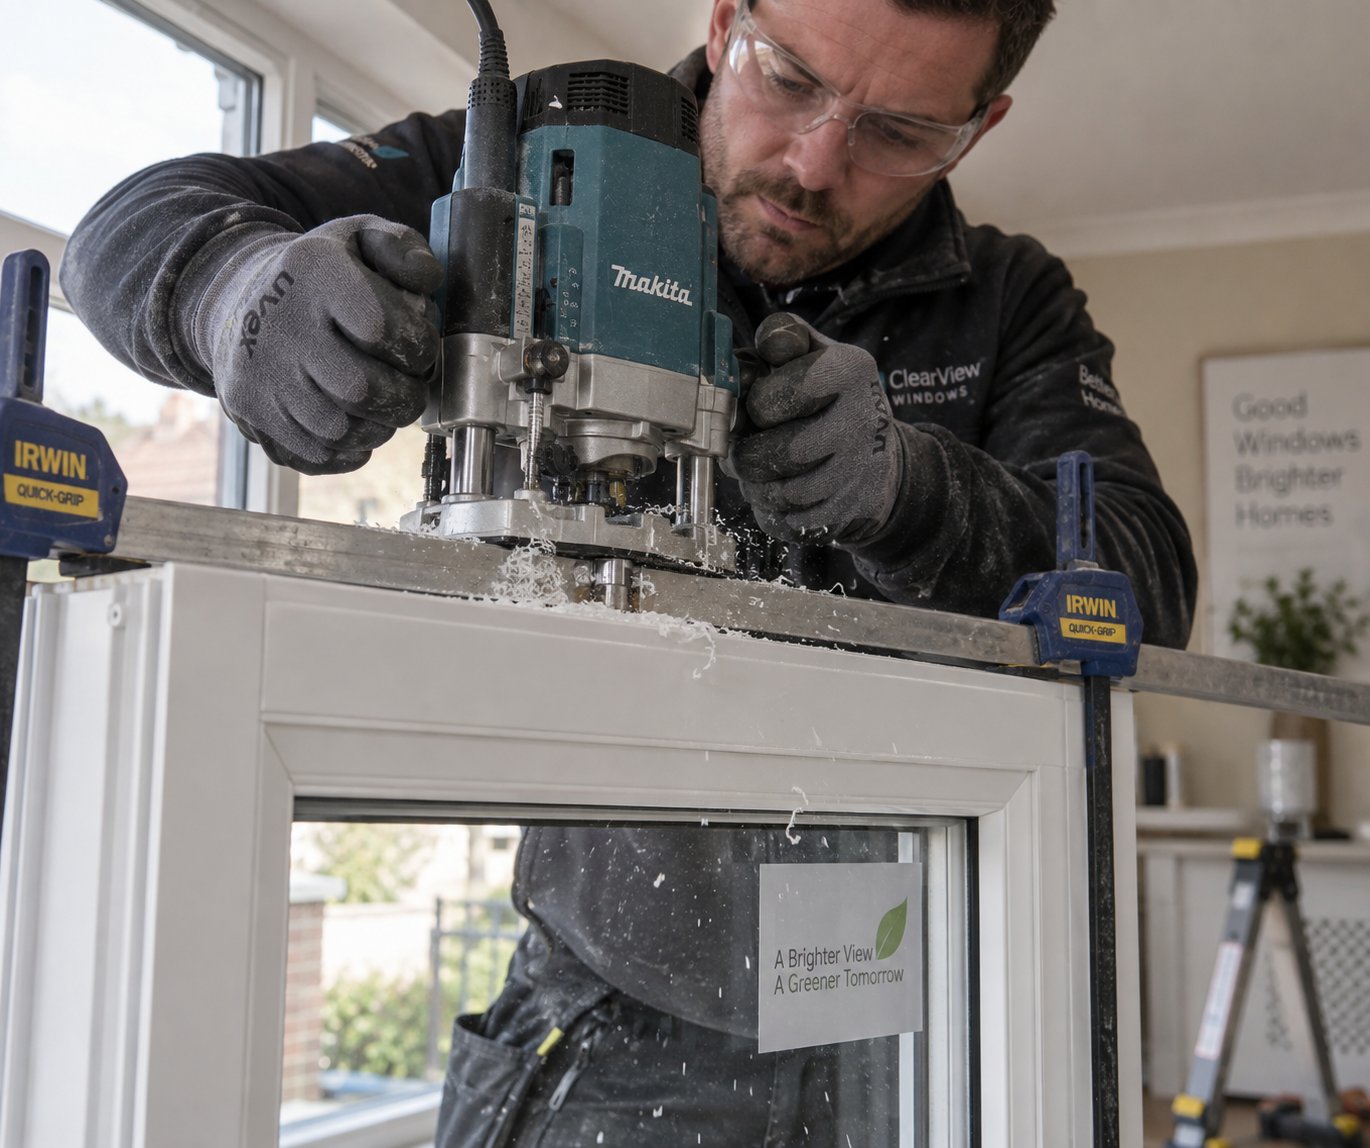
You've seen the per-vent prices. You know that labour accounts for the lion's share of the bill. But what exactly is the installer doing during those 20 to 40 minutes that justifies a £40-£100 labour charge on a vent unit that costs less than a takeaway dinner? Understanding how to install trickle vents in windows — step by step — reveals why the process demands precision, experience, and the right tools, and why rushing any stage can turn a minor job into an expensive repair.
The entire process breaks down into two distinct phases: preparation and execution. Each one carries risks that are invisible to the homeowner watching from across the room but painfully obvious to the person holding the router.
Every professional installation begins well before any cutting tool is switched on. This first phase is where mistakes are either prevented or locked in permanently, because once a slot is routed into a window frame, there's no undoing it.
Sounds straightforward? In principle, it is. But consider what happens if the measurement is off by even a few millimetres. A slot cut too low breaches the glazing rebate — the channel holding the sealed double-glazed unit — potentially cracking the glass or breaking the unit's seal. A slot cut through hidden steel reinforcement requires switching to specialist HSS (High-Speed Steel) cutters mid-job. A slot that overlaps with locking hardware destroys the window's security function. This is why professional installation is recommended for most homeowners: the measuring phase is where experience pays for itself.
With every mark verified from both inside and outside the window, the installer moves to the irreversible stage. Here's how to install a trickle vent once the preparation is complete:
The entire sequence — from first measurement to final airflow check — typically takes a professional installer 20 to 40 minutes per window. That range depends on frame material, accessibility, and whether any complications like steel reinforcement arise during cutting. Installing a trickle vent on a ground-floor uPVC casement window might take 20 minutes. The same task on a second-floor aluminium tilt-and-turn window could stretch to 40 minutes or more.
This timeline explains why per-vent labour charges can feel steep relative to a vent unit costing £15 to £40. You're not paying for the plastic component. You're paying for the precision cutting, the risk management, the specialist tools, and the insurance that covers accidental damage to a sealed unit worth far more than the vent itself.
That last point — the risk of accidental damage — raises an obvious question. Could you skip the professional entirely and do it yourself?
The vent unit itself might cost £15 to £40. The professional labour to fit it could add another £40 to £100 on top. Multiply that across five or ten windows, and the labour bill alone starts to rival the cost of a weekend away. Naturally, many homeowners look at that maths and think: why not just do it myself?
It's a fair question — and for some people, DIY is genuinely the right call. But for others, it's the kind of false economy that turns a £60 job into a £300 problem. The honest answer depends on your tools, your confidence, and your tolerance for risk.
Trickle vent units are among the cheapest components in any window project. A standard manual vent costs between £8 and £20. Even an acoustic model rarely exceeds £60. By handling the installation yourself, you eliminate the labour charge entirely — potentially saving £40 to £100 per vent, which adds up fast across a whole property.
A five-window DIY project using mid-range vents might cost £75 to £150 in materials. The same job quoted professionally could run £250 to £500 or more once labour, call-out fees, and VAT are factored in. That's a meaningful saving, especially for homeowners on a tight renovation budget.
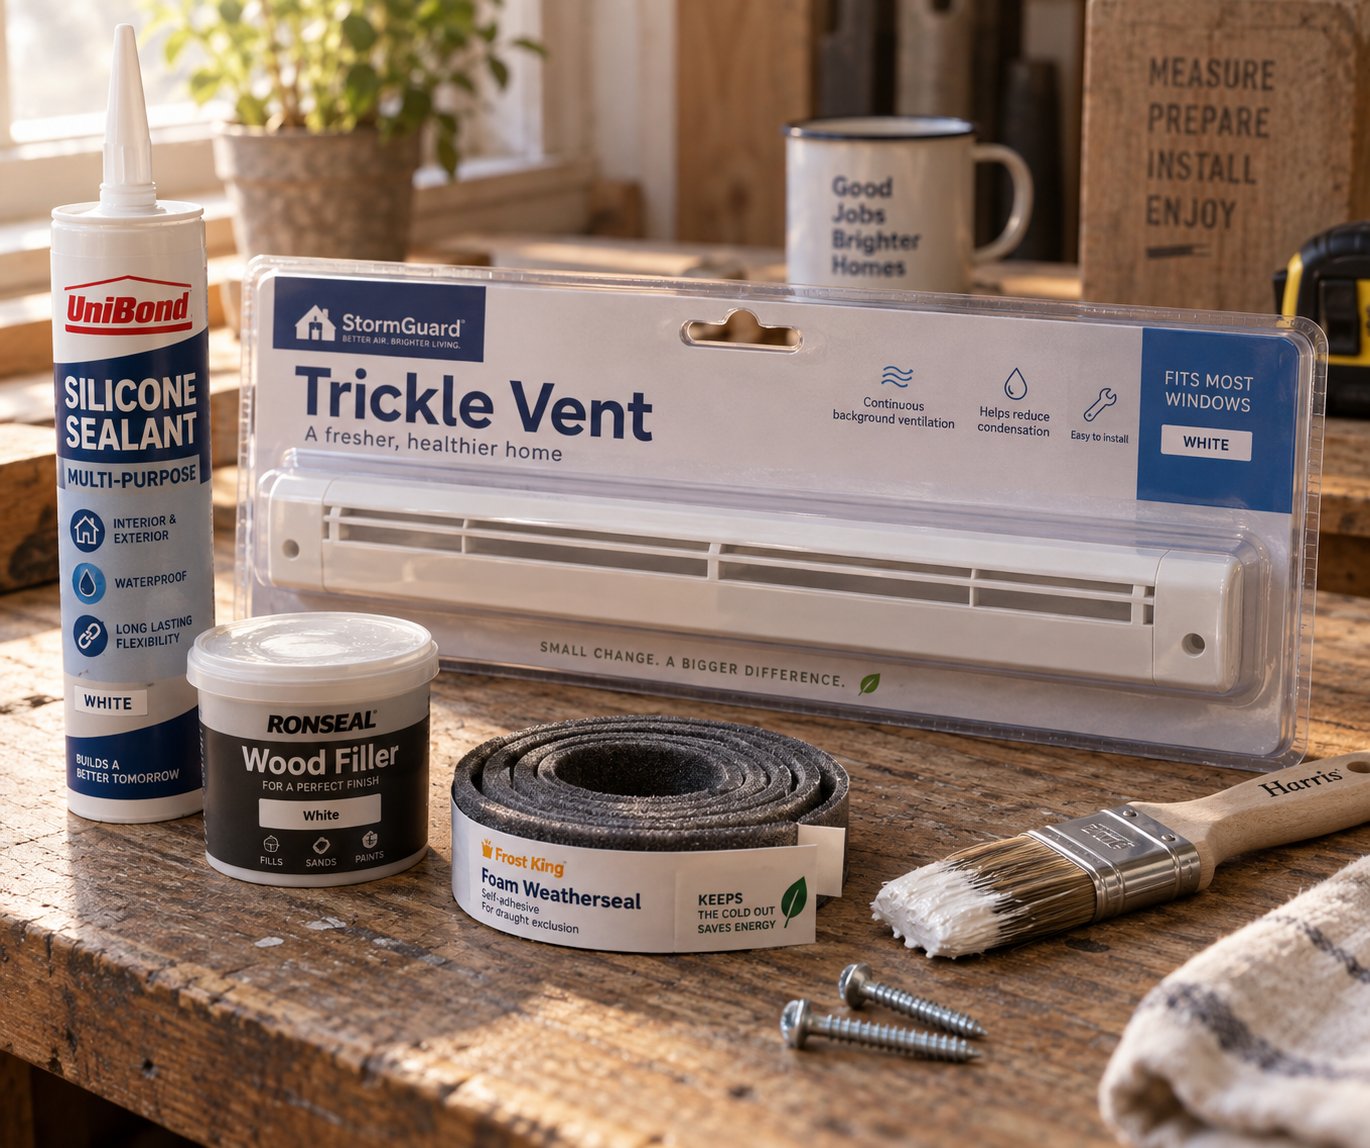
So what do you actually need to do it yourself? The tool and material list is shorter than most people expect:
If you already own a router or multi-tool, a drill, and basic measuring equipment, your out-of-pocket cost per vent is essentially just the vent unit plus a tube of sealant. That makes DIY installation genuinely attractive — on paper.
The problem is what happens when things go wrong. And with trickle vent installation, the consequences of a mistake are disproportionately expensive relative to the simplicity of the job.
Here's what's at stake:
None of these risks mean DIY is inherently a bad idea. They mean it demands respect. If you've successfully routed timber, drilled clean holes in plastic or metal profiles, and worked confidently with power tools in confined spaces, you have the skills to handle how to install window trickle vents without incident. If this would be your first time using a router, or your first time cutting into a sealed window frame, the learning curve carries a price tag you may not want to pay.
Certain scenarios make professional fitting the clearly rational choice, regardless of your DIY confidence level. The labour premium buys you more than just time savings — it buys expertise, insurance, and accountability.
Aluminium frames top the list. These profiles require specialist cutting tools, precise knowledge of thermal break positions, and experience working with slim cross-sections where the margin for error is measured in millimetres rather than centimetres. A professional who regularly handles aluminium systems will own the right equipment and know the profile's internal geometry before making the first cut. A DIY attempt on an unfamiliar aluminium profile is a gamble with poor odds.
Upper-floor windows introduce safety risks that no cost saving justifies. Working from a ladder while operating a router or multi-tool on a window frame above head height is inherently dangerous. Professional installers either work from inside where possible or use scaffold towers that provide stable, level platforms. If your project involves any window above the first floor, the access cost built into a professional quote is buying your physical safety.
Frames with unknown reinforcement present a hidden variable that catches DIY installers off guard. If you can't confirm whether your uPVC frames contain steel stiffeners — or exactly where those stiffeners are positioned — a professional installer's magnet test and profile knowledge removes the guesswork. Cutting blind into a reinforced frame risks exactly the kind of structural damage described above.
Windows still under warranty deserve particular caution. Some window manufacturers and installation companies offer professional retrofit services that preserve the original warranty, or they provide written guidance on acceptable modification methods. Contacting your supplier before picking up a drill could save you from invalidating coverage worth far more than the labour charge you're trying to avoid.
Professional trickle vent installers also carry public liability insurance and, in many cases, professional indemnity cover. If an installer accidentally cracks your sealed unit, damages the frame, or creates a water ingress problem, their insurance pays for the repair — not your wallet. DIY offers no such safety net.
The cost of replacing a damaged sealed double-glazed unit — typically £70 to £200 or more — almost always exceeds the labour cost of professional trickle vent installation. For most homeowners, the insurance value of professional fitting alone justifies the price difference.
Finding qualified trickle vent installers near you is straightforward once you know where to look. Start with window companies registered under FENSA or CERTASS Competent Person Schemes, as these organisations require members to self-certify compliance with Building Regulations. Local glazing specialists and general window repair companies also frequently offer vent retrofitting as a standalone service. When evaluating options, check for:
Searching for "trickle vent installers near me" will return local glazing companies, but cross-reference those results against trade body directories to verify credentials. A registered installer may cost slightly more per vent, but the combination of regulatory compliance, workmanship guarantee, and insurance protection typically represents better value than an unregistered handyman offering a lower headline price.
Whether you choose to pick up the router yourself or hand the job to a professional, the per-vent cost you've budgeted may not be the final number on your invoice. Several additional expenses have a habit of appearing only after work has started — or worse, after it's finished.
A trickle vent costing £20 and a labour charge of £60. That's £80 per window, times five windows, equals £400. Simple maths, right? Except the final invoice rarely matches that calculation. How much does it cost to install trickle vents across an entire property? Almost always more than the headline per-vent figure suggests, because several line items only surface once the installer is on-site, tools in hand, discovering complications that weren't visible during the initial quote.
These aren't scams or deliberate overcharges. They're genuine additional expenses that arise from the realities of cutting into existing window frames, working at height, or specifying vents that actually meet your Part F requirements. The difference between a frustrating surprise bill and a well-managed budget comes down to knowing what to look for before you sign off on a quote.
Picture this: the installer finishes routing and fitting your trickle vents, packs up the tools, and leaves. You look at your window frames and notice bare timber edges where the router exposed raw wood, filler needed where the template screws left small holes, or paint scuffed by clamps and straight-edge guides. The vent works perfectly — but the window looks like it's been through minor surgery. That "making good" work isn't always included in the original quote, and it adds cost that catches homeowners off guard.
Here are the additional expenses most likely to appear beyond the vent unit and basic labour charge:
Any one of these extras might seem minor in isolation. Stack three or four together — a timber frame needing repainting, a first-floor window requiring scaffold access, and a call-out charge on a small job — and your actual spend can land 40% to 60% above the per-vent figure you originally budgeted.
There's another cost variable hiding in plain sight on every trickle vent product listing: the Equivalent Area (EA) rating. You might assume a vent is a vent, but the EA rating determines how much usable airflow each unit delivers — and that directly affects how many vents your property needs, which in turn drives total project cost.
Here's how it works. Part F calculations set a minimum total equivalent area for each room. A typical habitable room (bedroom, living room) requires at least 8,000mm² EA. A kitchen or bathroom with an extract fan needs a minimum of 4,000mm² EA. You can reach those targets with different combinations of vents:
The maths is counterintuitive. A more expensive vent can produce a cheaper overall project because you need fewer of them. Fewer vents means fewer cuts, less labour time, fewer potential damage points, and less making-good work. Across a five-bedroom house where every habitable room needs 8,000mm² EA, choosing single high-EA vents over pairs of low-EA units could eliminate five or more installations from the project scope entirely.
The flip side? Higher-EA vents tend to be physically larger, requiring a wider or longer slot in the frame head. Not all window profiles can accommodate them — slimmer aluminium frames and narrow sash meeting rails may physically limit you to smaller units, forcing you back toward multiple lower-rated vents whether you like it or not. Your installer should calculate the most cost-efficient EA combination that your specific frames can actually accept, rather than defaulting to whichever vent they happen to stock.
Automatic humidity-controlled vents add another layer to this equation. At £70 to £120 per unit, they cost significantly more than manual alternatives. But in rooms where condensation is a persistent problem — bathrooms, utility rooms, bedrooms with poor cross-ventilation — they open and close automatically based on moisture levels, potentially eliminating the need for additional mechanical extract upgrades. Whether that premium delivers genuine value depends on the specific room conditions and the alternative ventilation options available.
The practical takeaway from all of this? Before agreeing to any quote, ask your installer one question that cuts through every hidden cost at once:
Always request an itemised quote that separately lists vent supply cost, labour per vent, access equipment charges, making-good work, and any call-out or minimum fees. A single bundled figure makes it impossible to identify overcharging or unnecessary extras.
An installer confident in their pricing will have no issue breaking it down. One who resists itemisation is either padding the quote or hasn't thought carefully enough about what the job actually involves — neither of which inspires confidence. With a transparent, line-by-line breakdown in hand, you're equipped to compare quotes on a genuinely like-for-like basis and catch the fees that would otherwise surface only after the work is done.
An itemised quote is only as useful as the information you gave the installer to produce it. Vague requests generate vague pricing. Detailed, specific enquiries generate quotes you can actually compare. Yet most homeowners contact an installer with little more than "I need trickle vents" and a rough window count — then wonder why three quotes come back with wildly different totals and no obvious way to tell which one represents fair value.
The gap between overpaying and getting a competitive price often comes down to preparation. Provide the right details upfront, ask the right follow-up questions, and you'll turn the quoting process from a guessing game into a genuine comparison exercise. Here's exactly how to do it.
Before you pick up the phone or send an enquiry form, gather the following details about your property. Having this information ready saves time, reduces the risk of inaccurate estimates, and signals to the installer that you're an informed customer — which, in itself, tends to produce more carefully considered pricing.
Providing this level of detail might feel like overkill for what seems like a small job. But consider the alternative: a quote based on assumptions. The installer assumes all windows are ground-floor uPVC casements, prices accordingly, then arrives on-site to find second-floor aluminium tilt-and-turns. The original quote becomes meaningless, and you're either facing a revised price or watching the installer walk away.
Three quotes is the widely recommended minimum, and for good reason. Fewer than three gives you no meaningful benchmark. More than five creates decision fatigue without significantly sharpening your price picture. Three well-targeted quotes from qualified installers — each given identical information — reveal both the market rate for your specific project and any outlier pricing that deserves scrutiny.
The challenge isn't getting three numbers. It's comparing them on a like-for-like basis. Two quotes might both say "£600 for ten windows" but include completely different scopes of work. To install window trickle vents at a fair price, you need to compare the following elements across every quote you receive:
Be cautious of any quote that bundles everything into a single line item — "Supply and fit trickle vents to 8 windows: £720" — with no further breakdown. This format makes it impossible to identify where the money is going. Is the vent supply cost inflated? Is the labour rate above market? Are access charges buried in the total? Without line-by-line transparency, you're comparing headlines, not substance.
One more question worth asking every installer: do they supply the vents, or do they expect you to source them? This distinction matters more than most homeowners realise. Installers who supply vents typically mark up the unit cost — sometimes modestly, sometimes significantly. If you're given the option to source vents yourself, you can shop around for the best price on the specific product and EA rating specified in the quote. For larger projects covering ten or more windows, buying vents directly from a specialist supplier and handing them to the installer for fitting can shave a meaningful percentage off the materials portion of the bill. Just confirm with the installer that they're willing to fit customer-supplied vents and that doing so won't affect their workmanship warranty.
Equipped with itemised, comparable quotes and a clear understanding of what each line item covers, you're in a strong position to make a confident decision. But there's one final question worth asking before committing to any installation approach: are trickle vents actually the most cost-effective ventilation solution for your specific property?

Every section of this guide so far has assumed trickle vents are the right solution and focused on helping you manage the expense. But should you install trickle vents at all? For most standard window replacements and straightforward retrofits, yes — they remain the cheapest route to Part F compliance. For certain properties, though, the total trickle vent installation cost across every window can approach or even exceed the price of an alternative ventilation system that delivers better performance, lower running costs, and fewer long-term headaches.
That's not a popular thing to say in an article about trickle vents. But if you're about to spend £500 to £1,000+ retrofitting vents into a dozen windows across a larger property, you deserve to know whether that money could work harder elsewhere.
Trickle vents are one of several ways to satisfy Part F's background ventilation requirements. They happen to be the most common because they're simple, passive, and cheap on a per-unit basis. But "cheapest per unit" doesn't always mean "cheapest overall" — especially when you factor in ongoing energy costs, maintenance burden, and the number of individual installations a property requires.
Here's how the main options compare across the metrics that actually matter to your wallet and your indoor air quality:
| Ventilation Method | Approximate Per-Property Cost (Installed) | Ongoing Running Costs (Annual) | Maintenance Requirements | Best Suited For |
|---|---|---|---|---|
| Trickle Vents (natural ventilation) | £200 - £1,500 (depending on number of windows and frame material) | £0 (passive — no electricity required) | Minimal — occasional cleaning and checking vents are not blocked or painted shut | Standard window replacements, smaller properties, budget-conscious retrofits |
| Mechanical Extract Ventilation (MEV) | £500 - £2,800 (including central fan unit and ductwork) | £10 - £80 (low-wattage continuous fan) | Clean extract grilles quarterly; check or replace fan filter every 6-12 months | Most standard new builds, properties where trickle vents alone provide insufficient moisture control |
| Humidity-Sensitive Vents | £350 - £1,800 (higher per-unit cost, but fewer may be needed) | £0 (passive — automatic response to moisture levels) | Minimal — no moving mechanical parts; occasional cleaning of sensor strip | Rooms prone to condensation (kitchens, bathrooms), properties where occupants forget to adjust manual vents |
| Passive Stack Ventilation (PSV) | £300 - £1,200 (ducts from wet rooms to roof-level outlets) | £0 (driven by natural convection and wind) | Low — check ducts are unobstructed annually; clean terminals | New builds designed for natural ventilation, properties with suitable vertical duct routes |
| Mechanical Ventilation with Heat Recovery (MVHR) | £3,000 - £6,000 (new build); £6,000 - £12,000 (retrofit) | £60 - £130 (continuous fans), offset by £200-£400 annual heating savings | Filter replacement every 6-12 months (£25-£50 per set); professional duct cleaning every 5-7 years | Highly airtight homes, premium new builds, allergy sufferers, properties near busy roads |
A few patterns jump out immediately. Trickle vents sit firmly at the bottom of the upfront cost scale and require zero running costs — a combination that explains their dominance as the default compliance method for window replacements. For a typical three-bedroom house needing six to ten vents, the total spend of £400 to £1,000 is difficult for any alternative to undercut.
MEV systems occupy the middle ground. At £500 to £1,500 fully installed in a new build, they pair a central extract fan with trickle vents in the windows — meaning you still need the vents, but the mechanical extraction handles moisture removal far more effectively than passive airflow alone. In retrofit scenarios, MEV costs climb to £1,500 to £2,800 once ductwork routing is factored in, according to current Part F compliance data.
MVHR is the premium option and, for certain properties, the smartest long-term investment. The upfront cost is dramatically higher — £3,000 to £6,000 in new builds, and potentially double that for retrofits where ductwork routing can add £1,000 to £2,000 to the installation. But the system recovers 90-95% of heat from outgoing air, which translates to annual heating savings of £200 to £400 in a well-insulated home. It also eliminates the cold draughts that trickle vents produce on winter mornings and provides filtered incoming air — a genuine benefit for anyone dealing with allergies, asthma, or a home near heavy traffic.
Do you have to install trickle vents if your property uses MVHR? No. In fact, you shouldn't. As ventilation system analysis from BWS confirms, MVHR is a closed system — air enters only through the central unit. Adding trickle vents to windows in an MVHR-equipped home introduces unfiltered, unheated air that bypasses the heat exchanger, disrupting airflow balance and reducing system efficiency. The rule is simple: either airtight windows plus MVHR, or windows with trickle vents plus natural or mechanical extract ventilation.
Humidity-sensitive vents deserve special mention as a middle path. They cost more per unit than standard manual trickle vents — typically £70 to £120 versus £15 to £40 — but they open and close automatically in response to indoor moisture levels, using a polyamide strip that requires no electricity. In condensation-prone rooms, they can outperform manual vents that occupants forget to open, potentially reducing the need for supplementary mechanical extraction. Whether they justify the price premium depends on your specific moisture challenges and how diligently you'd actually adjust manual vents throughout the day. Be honest with yourself on that second point.
So which approach actually makes sense for your property? The answer depends on three variables that interact differently in every situation: property size, project scope, and budget horizon.
For standard window replacements in a typical two- to four-bedroom home, trickle vents remain the clear winner on cost. Factory-fitted vents add just £10 to £30 per window to a new order, and even a full retrofit across eight to ten windows rarely exceeds £1,000. The regulatory requirement is met, the per-window expense is manageable, and there are no ongoing running costs. If your windows are already being replaced, this is almost always the most affordable compliance route — and the one that makes arguing over alternatives unnecessary.
For larger properties requiring extensive retrofit work — imagine a six-bedroom period home with fifteen or more windows, a mix of timber and aluminium frames, upper-floor access challenges, and per-vent costs trending toward the £120 to £180 range — the total trickle vent installation cost can approach £2,000 to £3,000. At that spend level, you're within striking distance of an MEV system that provides superior moisture control, and you're at least worth comparing the long-term economics of MVHR if the property's airtightness supports it.
For small properties under 80m², such as flats and compact terraced houses, MVHR's fixed installation cost makes it harder to justify — the system costs roughly the same regardless of floor area, but the heating savings scale with property size. A small home with functioning natural ventilation and well-placed trickle vents achieves a reasonable compromise between cost and comfort. It's not the ideal solution, but it's a sensible one.
For projects involving custom frame profiles or specialist aluminium window systems, the calculation shifts again. Standard off-the-shelf trickle vents are designed around the most common profile dimensions. When your frames don't match those dimensions — as frequently happens with architectural aluminium systems, bespoke heritage profiles, or non-UK-manufactured windows — sourcing vents that integrate correctly becomes a project in itself. Poorly fitting vents create weatherproofing failures, aesthetic compromises, and callbacks that erode any savings from choosing a cheaper component. Suppliers like Shengxin Aluminium offer custom window trickle vents engineered to match specific frame profiles — a resource particularly relevant for fabricators and project buyers working with aluminium systems where standard vent dimensions fall short. Evaluating frame-specific vent solutions before committing to an installation approach can prevent the kind of fit issues that turn a straightforward project into a costly rework exercise.
Whatever direction you choose, the decision framework is the same. Calculate the total cost of trickle vent installation across your entire property — including every hidden expense covered in this guide — and compare that figure against the installed cost of alternative systems that would achieve equivalent or better ventilation performance. Factor in running costs over a five- to ten-year horizon. Consider the property's airtightness, your tolerance for cold draughts, and whether anyone in the household has respiratory sensitivities that filtered air would address.
For most homeowners replacing windows in a standard property, trickle vents remain the most affordable path to Part F compliance. But affordability is not the same as best value — and the right ventilation investment depends on your property, your budget, and how long you plan to live with the result.
The goal of this entire guide has been to move you from uncertain to informed. You now know what drives trickle vent pricing, where hidden costs lurk, how to evaluate quotes on a genuinely like-for-like basis, and when an alternative approach might serve you better. Armed with that knowledge, the next conversation you have with an installer will be a very different one.
Retrofitting trickle vents into existing windows typically costs between £55 and £180 per vent when professionally installed, depending on frame material and accessibility. uPVC frames sit at the lower end (£55-£110 per vent), timber frames fall in the middle (£70-£135), and aluminium frames command the highest prices (£90-£180). These figures cover both the vent unit and labour. However, glazed-in vent retrofits — where the sealed unit is replaced with a shorter pane to create space — can run from £120 to £300+ per vent. Additional charges for scaffolding, call-out fees, and making-good work often push the final bill 40-60% above the headline per-vent figure.
Yes, in most cases through-frame trickle vents can be cut directly into the window head without disturbing the sealed glazing unit. An installer routes a slot through the frame profile using a router or oscillating tool, then fits the vent assembly into the opening. However, this method requires careful checking for steel reinforcement in uPVC frames or thermal breaks in aluminium profiles. If the frame is too narrow or reinforcement blocks the cutting zone, a glazed-in vent is the alternative — this involves replacing the existing sealed unit with a slightly shorter one to accommodate the vent within the glass area. A professional site assessment beforehand confirms which method is viable for your specific frames.
Factory-fitted vents on new replacement windows are significantly cheaper — typically adding just £10 to £30 per window to the order price. By contrast, retrofitting vents into existing frames costs £55 to £180 per vent for standard through-frame installations, plus potential extras like scaffold hire and call-out fees. The cost difference exists because factory cutting uses CNC machinery that routes slots in seconds with zero damage risk, while retrofit work requires on-site hand-tool cutting, reinforcement checks, and careful weatherproofing. If your windows are nearing end-of-life, ordering replacements with pre-fitted vents is almost always the more economical path.
Under Part F of the Building Regulations in England (updated June 2022), replacement windows must provide equivalent or better background ventilation than the windows they replace. In practice, this almost always means fitting trickle vents or an approved alternative ventilation method. Homeowners cannot sign a disclaimer to opt out, and an indemnity policy is not considered a suitable substitute for meeting the ventilation requirements. Window installers registered under FENSA or CERTASS self-certify compliance, so they are obligated to include compliant ventilation in the specification. The only exception is if the property uses a whole-house mechanical ventilation system such as MVHR, which provides background ventilation through a different mechanism.
DIY installation saves the full labour charge of £40-£100 per vent and is feasible if you own a router or multi-tool, have experience cutting into window profiles, and are working on ground-floor uPVC casement windows. However, the risks are disproportionate to the savings. Cutting too deep can crack a sealed glazing unit costing £70-£200+ to replace, routing into hidden steel reinforcement can compromise the frame, and any modification may void your window warranty. Professional installation is strongly recommended for aluminium frames, upper-floor windows, frames with unknown reinforcement, and any windows still under warranty. Professionals also carry insurance that covers accidental damage — a safety net DIY cannot replicate.



 online service
 0086 136 3563 2360
 sales@sxalu.com
 +86 136 3563 2360
 English
 français
 Deutsch
 русский
 español
 português
 العربية
 ไทย
ไทย Việt
Việt Українська