Ever noticed condensation creeping across your windows on a cold morning? Or perhaps you've spotted dark patches of mould forming in the corners of your bathroom? These frustrating issues often stem from one common culprit: inadequate ventilation. This is precisely where trickle vent window installation becomes essential for maintaining a healthy, comfortable home.
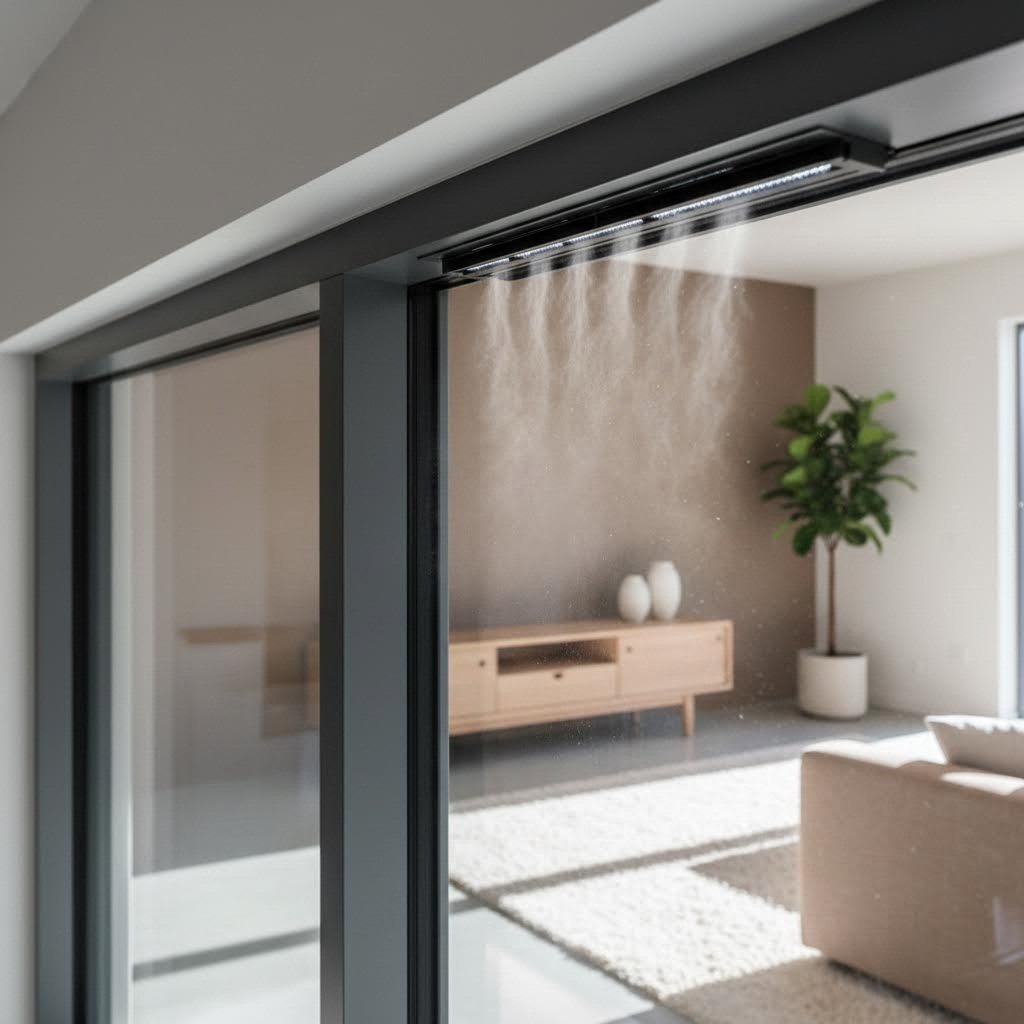
Window trickle vents are small, controllable openings integrated into window frames or door frames. They allow a constant "trickle-feed" of fresh air from outside into your living spaces. Think of them as your home's breathing mechanism - quietly working in the background to keep air circulating without you even noticing.
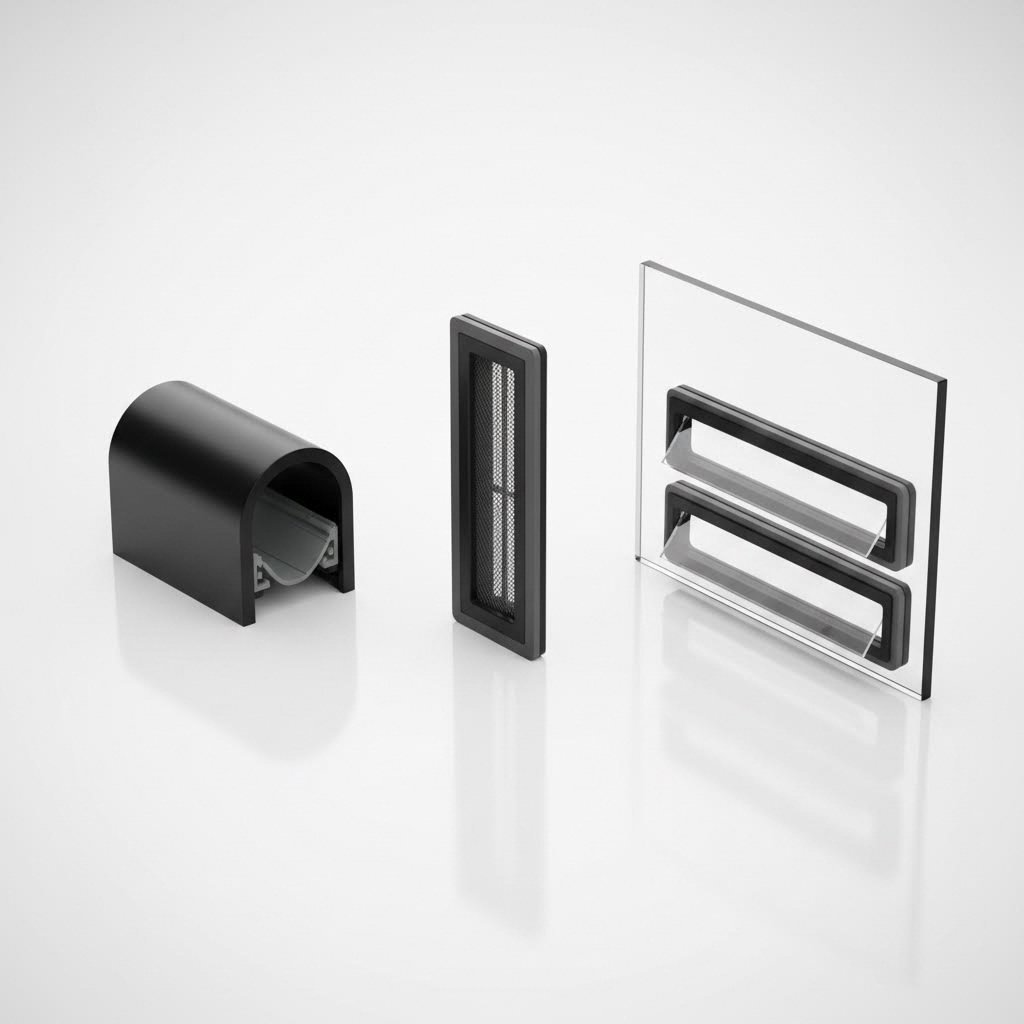
The design is elegantly simple. A trickle vent consists of a slit in the frame, staggered between the inside and outside, with an adjustable cover. According to Everest, although these vents can be closed, they're designed to remain open continuously for constant ventilation. When open, outside air enters through the external slot, travels through the vent channel, and exits through the internal opening. This creates a gentle, controlled airflow that displaces stale, moisture-laden indoor air.
Unlike opening a window wide, trickle air vents for windows provide measured ventilation. A typical vent allows 20-50 cubic metres of air per hour at a 10 Pascal pressure difference. This controlled flow means you get fresh air without the dramatic temperature drops or security concerns that come with leaving windows ajar.
Here's the irony of modern construction: the more energy-efficient we make our homes, the more ventilation problems we create. Today's windows and doors are considerably more draught-proof than their predecessors. While this is excellent for keeping heating bills down, it effectively seals your home like an airtight container.
Consider what happens inside a typical household daily. Showering, cooking, doing laundry, and even simply breathing releases substantial moisture into the air. Without adequate ventilation, this moisture becomes trapped. It condenses on cold surfaces like windows and walls, creating the perfect breeding ground for mould - a significant health hazard.
Trickle ventilation windows address this problem elegantly. They provide background ventilation that:
This comprehensive guide will walk you through everything you need to know about installing these essential ventilation components. From understanding building regulations and choosing the right vent type, through detailed installation instructions, to troubleshooting common problems - you'll find practical guidance for every stage of the process. Whether you're tackling a DIY project or simply want to understand what professional installation involves, this resource has you covered.
So you understand why trickle vents matter for your home's health - but are they actually required by law? The answer depends on your specific project. Understanding UK Building Regulations Part F is crucial before you begin any installation work, as it determines both what you must do and what capacity your drip vents in windows need to achieve.
Building Regulations Part F covers ventilation requirements for all dwellings in England. The government updated these regulations significantly, with changes coming into effect on 15th June 2022. The primary aim? Protecting occupant health by ensuring adequate indoor air quality and preventing mould growth.
Here's the core principle you need to understand: when replacing windows or undertaking renovations, your ventilation must be no worse than it was before the works began. In practical terms, this means:
There is one notable exception. If you're installing a Mechanical Ventilation with Heat Recovery (MVHR) system, trickle vents should not be fitted. MVHR systems provide controlled fresh air supply throughout your home, making additional background ventilators unnecessary - and potentially counterproductive to the system's efficiency.
When planning your installation, you'll encounter a term called "Equivalent Area" (EA). This isn't the physical size of the vent opening - it's a measure of how much air can actually pass through. Modern trickle vents in windows include internal baffles and design features that affect airflow, so equivalent area accounts for these factors to give you the true ventilation capacity.
The minimum EA requirements vary depending on your room type and building configuration. For multi-storey dwellings, the requirements are:
For single-storey properties like bungalows, living spaces and kitchens require a higher minimum of 10,000mm² equivalent area, while bathroom requirements remain at 4,000mm².
Beyond individual room requirements, Part F also specifies the minimum number of ventilators your home needs:
There are additional considerations that may affect your specific situation. Open-plan kitchen and living areas should have at least three ventilators with the same equivalent area as other habitable rooms. Properties with 70% or more of their openings on a single facade, or kitchens without external windows, require specialist guidance as standard tables don't apply.
One final positioning requirement: all background ventilators should be installed at least 1,700mm above floor level. This height prevents cold incoming air from creating uncomfortable draughts at sitting or standing height, while remaining accessible for manual control.
With these regulatory requirements clearly understood, you're ready to select the right type of trickle vent for your specific window style and installation circumstances.
Now that you understand the regulatory requirements, here's the practical question: which trickle vent should you actually buy? With several designs available, each suited to different situations, making the right choice upfront saves considerable time and frustration during installation. Let's break down your options so you can match the perfect vent to your specific window style and circumstances.
Trickle vents windows fall into three main categories, each with distinct installation methods and applications. Understanding these differences helps you identify which approach works for your project.
These are the most common window air vents you'll encounter. Through-frame vents are machined directly into the window frame itself, with slots cut through the profile to allow air passage. According to Durajoin, they typically provide airflow rates of 5,000-6,000mm² equivalent area.
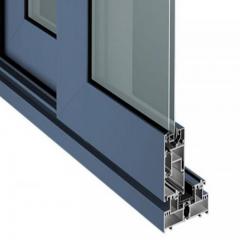
The main advantage? They sit flush with the frame, creating a discreet appearance that doesn't alter your window's profile. They're compatible with uPVC, timber, and aluminium frames, making them the default choice for most new installations and replacements.
When you can't cut into the existing frame - perhaps because of structural concerns or limited frame depth - over-frame vents offer an alternative. These units mount on top of or adjacent to the frame rather than through it, making them ideal for retrofit applications.
You'll notice they're slightly more visible than through-frame options, sitting proud of the window profile. However, they typically deliver 4,000-5,000mm² equivalent area and can be added to existing windows without major structural modifications. For older properties needing ventilation upgrades, this is often the most practical route.
Sometimes called "easy glaze trickle vents," these are integrated directly into the sealed glass unit rather than the frame. They're positioned in the upper section of the glazing, typically behind a spacer bar that separates the glass panes.
When would you choose this option? Primarily when frame space is extremely limited or when architectural features prevent frame-based installation. They offer around 2,000-4,000mm² equivalent area - lower than frame-mounted alternatives - but provide a solution where other types simply won't fit.
| Vent Type | Best Applications | Pros | Cons |
|---|---|---|---|
| Through-Frame | New installations, window replacements, most standard projects | Discreet appearance, highest airflow capacity (5,000-6,000mm² EA), works with all frame materials | Requires frame machining, not suitable for all retrofit situations |
| Over-Frame | Retrofit projects, limited frame depth, adding vents to existing windows | No frame cutting required, cost-effective for upgrades, good airflow (4,000-5,000mm² EA) | More visible profile, may require additional fixing considerations |
| Glazed-In | Limited frame space, heritage windows, unique architectural features | Minimal visual impact on frame, suitable where frame vents aren't possible | Lower airflow capacity (2,000-4,000mm² EA), specialist installation often required |
Your window's operating mechanism significantly influences which air vents for double glazed windows will work effectively. Here's how different window styles pair with vent options.
These side-hinged or top-hinged windows offer the most flexibility for trickle vent installation. Through-frame vents fit easily into the head of the frame (the horizontal top section), with the internal canopy opening into the room and the external canopy facing outward. Both the opening casement and the fixed frame sections can accommodate vents, giving you multiple placement options to meet ventilation requirements.
Traditional vertical sliding sash windows present more challenges. The slim meeting rails and historic profiles often limit space for standard through-frame vents. Over-frame options work well here, mounting above the upper sash without interfering with the sliding mechanism. For period properties where appearance is critical, glazed-in vents maintain the authentic look while providing necessary ventilation.
Popular in modern construction, tilt-and-turn windows can accommodate through-frame vents in the fixed outer frame section. However, placement requires careful consideration - the vent mustn't interfere with the complex hardware that enables both tilt and turn functions. Installing in the frame head, away from the opening mechanism, typically works best.
Living near a busy road, flight path, or entertainment district? Standard trickle vents might solve your ventilation problems while creating a new one: noise intrusion. This is where acoustic trickle vents become essential.
According to Titon, acoustic vents use sound-absorbing materials and complex internal chamber designs to attenuate noise while maintaining airflow. The key performance metric to look for is the Dn,e,w rating - expressed in decibels (dB), with higher values indicating better sound reduction. A vent rated at 44 dB will block significantly more noise than one rated at 35 dB.
When should you specify acoustic vents?
Be aware that acoustic vents often require dual components - an internal ventilator combined with an external canopy - to achieve their rated performance. They're typically larger than standard vents, so check that your frame can accommodate them before ordering.
With your vent type selected, the next critical step is understanding how installation requirements differ based on your window frame material. uPVC, timber, and aluminium each demand specific approaches to ensure secure, weathertight fitting.
You've selected your trickle vent type and confirmed it meets regulatory requirements. Now comes the hands-on work - but here's where many DIY guides fall short. The installation process varies dramatically depending on whether your house window vents will go into uPVC, timber, or aluminium frames. Each material has distinct properties that affect drilling technique, fixing methods, and long-term performance. Get this wrong, and you risk cracked frames, air leaks, or even structural damage.
Let's walk through the specific considerations for each frame material, ensuring your window trickle vent installation succeeds regardless of what you're working with.
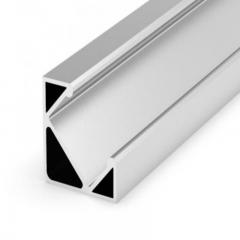
uPVC (unplasticised polyvinyl chloride) is the most common window frame material in UK homes, and fortunately, it's also the most forgiving for trickle vent installation. The material is relatively soft compared to metal, making drilling straightforward - though this softness demands respect to avoid mistakes.
Before you begin, understand uPVC frame construction. Most profiles are hollow with internal chambers and reinforcing steel. Your vent slots must avoid these steel reinforcements entirely. A typical uPVC window head section provides 25-35mm of workable depth, but this varies by manufacturer. Always check your specific frame's cross-section if possible.
The primary risk with uPVC is cracking. The material becomes more brittle in cold weather, so if you're installing during winter months, consider bringing the window to room temperature first if practical. When drilling, excessive pressure or blunt bits can cause the plastic to fracture rather than cut cleanly.
According to GFD Homes, using a step drill bit provides superior precision with uPVC frames. Step bits create clean, graduated holes without the "grabbing" that standard twist bits can cause in plastic materials.
Thermal bridging is less of a concern with uPVC than metal frames, as the plastic itself is a poor heat conductor. However, cutting through to the external environment creates a pathway for heat loss. Ensure your vent includes adequate draught-stripping and seals properly against the frame surface.
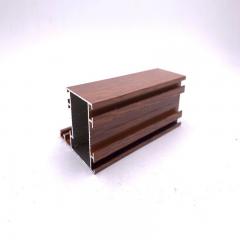
Timber windows offer aesthetic warmth that many homeowners prize, but they introduce installation considerations that plastic simply doesn't have. Wood is a natural material with grain direction, moisture content variations, and structural integrity requirements that demand careful attention during trickle vent window fitting.
The good news? Timber is generally easy to work with if you understand its characteristics. The cutting itself is straightforward with appropriate woodworking bits. The challenges lie in protecting the wood from moisture ingress and ensuring your installation doesn't compromise the frame's structural integrity.
Frame depth is your first assessment. Older hardwood frames are often substantial, providing plenty of material to work with. Modern engineered timber frames may be slimmer, requiring careful measurement to ensure you don't break through into the glazing rebate or compromise weather seals.
Moisture protection is critical. Every cut you make through a painted or treated timber surface exposes raw wood to potential water ingress. This is particularly important on the external face, where driving rain could penetrate the vent installation and cause rot over time. Sealing all cut edges with primer or preservative before fitting the vent is non-negotiable.
Consider grain direction when positioning your installation. Cutting across the grain creates cleaner edges than cutting along it, where splitting is more likely. If your chosen vent position runs parallel to the grain, score the cut lines deeply with a sharp knife before drilling or routing to prevent tear-out.
Aluminium frames present the most challenging installation scenario for DIYers, and increasingly, they're also raising concerns among professional installers. The material's properties - particularly its excellent thermal conductivity - create potential issues that don't exist with other frame types.
The Council for Aluminium in Building (CAB) has reported a growing number of window installation problems since trickle vents became compulsory under Part F regulations. Their Technical Director, Dale Pegler, explains the concern: "The trickle vent cut-outs allow air to circulate around the external perimeter of the window frame between the frame profile and the structure. The external air then acts as a cold bridge to the internal aluminium profiles, increasing the risk of condensation on the internal face of the profile."
This emerging issue means moisture-related callbacks have increased significantly, with damage to cill boards, internal plasterboard, and oxidisation of internal window profiles being reported.
Thermal bridging is the primary concern. Unlike uPVC or timber, aluminium conducts heat efficiently. When you cut ventilation slots through an aluminium profile, you create pathways for cold air to circulate within the frame chambers. This cold air chills the internal aluminium surfaces, potentially causing condensation to form on the inside face of your window frame during cold weather.
The problem often takes time to manifest - moisture damage may not become visible for months or even years after installation. CAB notes that complaints increase during winter when homes have more moisture buildup and outside temperatures drop.
One potential solution being explored involves inserting foam or thermal break material into profile chambers before routing trickle vent slots. The vent holes then cut through this insert, providing a thermal barrier on the aluminium faces. If you're installing in aluminium frames, discuss this approach with your supplier or fabricator.
Additionally, aluminium is harder to drill than uPVC or timber. The material requires metal-compatible drill bits, slower speeds to prevent overheating, and cutting lubricant to achieve clean results.
If you're considering DIY installation on aluminium windows, understand that this material presents genuine technical challenges that even professionals are still addressing. The thermal bridging issue identified by CAB is a developing concern - seeking specialist advice before proceeding is strongly recommended.
With a clear understanding of how your specific frame material affects the installation approach, you're ready to move on to precise measurement and sizing. Getting accurate dimensions before cutting is essential - there's no undo button once you've drilled into your window frame.
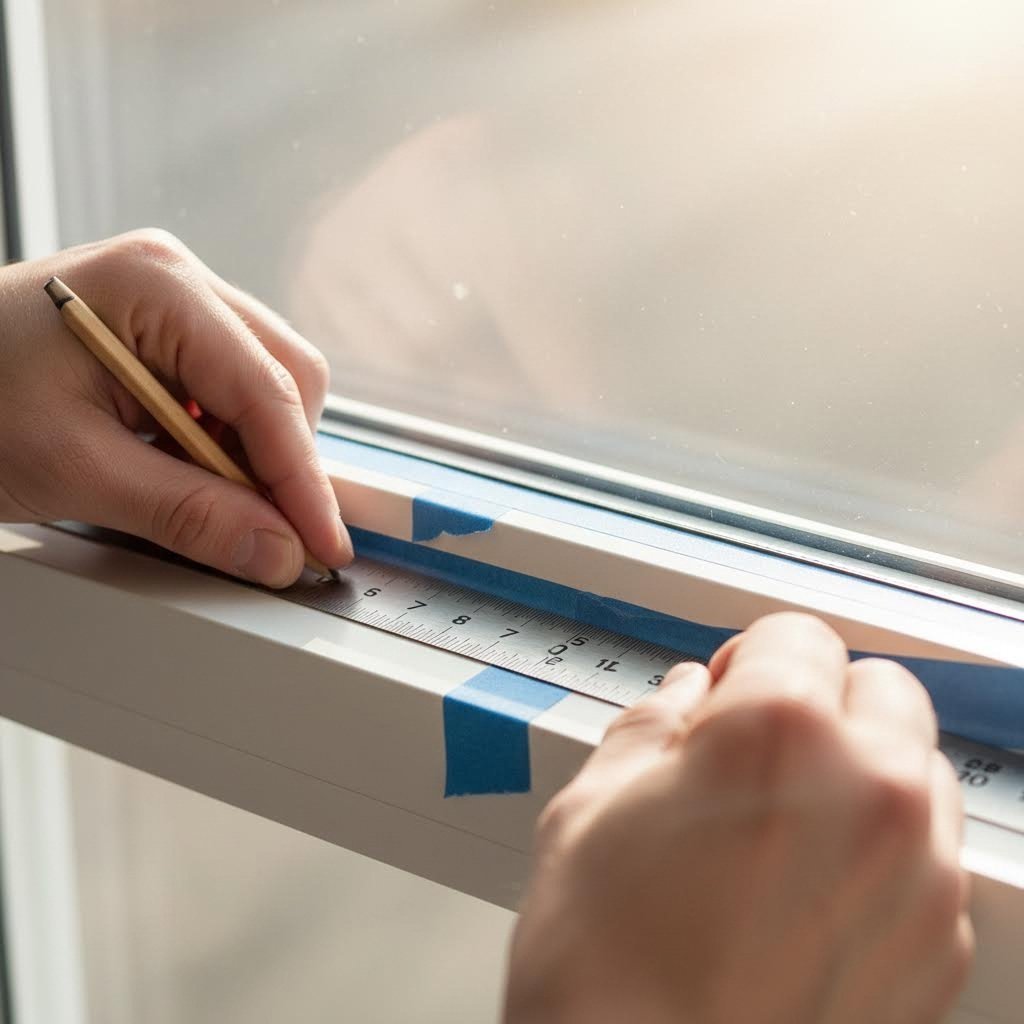
You've selected the right vent type and understand your frame material - but here's where precision becomes everything. Measure incorrectly, and you'll either end up with a vent that doesn't fit, inadequate ventilation that fails building regulations, or worse, a damaged window frame. Unlike many home improvement tasks where "close enough" works, trickle vents for windows demand accuracy within millimetres.
This section walks you through a methodical measuring process that eliminates guesswork. Whether you're fitting windows vents to a single room or tackling a whole-house project, following these steps ensures your installation meets both practical and regulatory requirements.
Before ordering any components, you need three critical measurements from your existing window: frame depth, available headroom, and the clear width for vent placement. Let's work through each systematically.
Frame depth determines whether a through-frame vent will physically fit your window. You're measuring how much material exists between the internal and external faces of the frame - this is where your vent slot will be cut.
For accurate measurement:
Most standard trickle vents require a minimum frame depth of 25mm, though some compact designs work with as little as 18mm. If your frame depth falls below the vent manufacturer's specification, you'll need to consider over-frame alternatives instead.
Headroom refers to the vertical space between the top of your glazing and the top edge of the frame. This measurement determines how tall a vent you can accommodate without interfering with the sealed glass unit or weather gaskets.
To measure headroom accurately:
Standard through-frame vents typically require 12-15mm of headroom, while larger capacity units may need 20mm or more. Check your chosen product's specifications before proceeding.
The width available for your vent installation affects both the size of unit you can fit and where you position it. You're looking for unobstructed frame length without hardware, hinges, or structural elements.
For casement windows:
For sash windows:
The Vufold installation guide for timber bifold doors recommends marking the exact centre point of your door or window first, then measuring outward to ensure symmetrical vent placement. This approach works equally well for standard windows and ensures balanced airflow distribution.
Once you have your measurements, transfer them to the frame using the following method:
Physical fit is only half the equation. Your trickle vent must also deliver sufficient equivalent area (EA) to meet Building Regulations for your specific room. This is where many installations fall short - fitting a vent that physically works but legally doesn't comply.
According to VENTI Group, living room trickle vents should have a minimum equivalent area of 8,000mm² for multi-storey dwellings and 10,000mm² for single-storey dwellings under Approved Document F (2021). These same requirements apply to bedrooms and kitchens in multi-storey properties.
Here's a quick reference for minimum EA requirements:
| Room Type | Multi-Storey Dwelling | Single-Storey Dwelling |
|---|---|---|
| Living Room | 8,000mm² EA | 10,000mm² EA |
| Bedroom | 8,000mm² EA | 10,000mm² EA |
| Kitchen | 8,000mm² EA | 10,000mm² EA |
| Bathroom | 4,000mm² EA | 4,000mm² EA |
Now compare these requirements against your chosen vent's specifications. A trickle ventilator 4000 (providing 4,000mm² EA) would meet bathroom requirements but would need doubling up for living spaces in a multi-storey home. Higher capacity vents like 8,000mm² models satisfy living room requirements with a single unit.
What if your chosen vent doesn't meet the required EA on its own? You have two options:
When installing multiple vents, distribute them across different windows in the same room where possible. This promotes better air circulation than concentrating all ventilation in one location.
Most quality trickle vent products include paper or card templates that simplify marking and drilling. These templates show exact hole positions, slot dimensions, and screw locations.
To use a template effectively:
If your product doesn't include a template, create one from card using the manufacturer's dimensional drawings. This extra step takes minutes but prevents costly mistakes.
Beyond meeting minimum requirements, vent positioning affects how effectively fresh air circulates. According to Building Regulations, all background ventilators should be installed at least 1,700mm above floor level - this height prevents cold incoming air from creating uncomfortable draughts at sitting or standing positions.
For best results:
Even experienced installers make measurement errors. Being aware of common pitfalls helps you avoid them.
Taking a single measurement and trusting it implicitly invites errors. Window frames can be out of square, warped, or inconsistent along their length.
Solution: Measure at multiple points and use the most restrictive dimension. If frame depth varies from 28mm to 32mm across the width, base your vent selection on the 28mm figure.
uPVC frames contain steel reinforcement that's invisible from outside. Attempting to drill through this steel without proper metal-cutting bits causes damage and frustration.
Solution: Tap along the frame to identify hollow versus reinforced sections. The sound changes distinctly. Position your vent in hollow sections wherever possible, or ensure you have HSS drill bits ready if cutting through steel is unavoidable.
Your internal measurements might be perfect, but external factors can still prevent installation. Cladding, external beading, or render might interfere with the external canopy.
Solution: Check both internal and external faces before finalising vent position. Walk outside and verify your chosen location is clear of obstructions.
A vent that's physically 300mm long might deliver 4,000mm² or 8,000mm² equivalent area depending on its internal design. Physical dimensions don't directly indicate ventilation capacity.
Solution: Always check the manufacturer's EA rating, not just the vent's physical measurements. A smaller vent with efficient internal design may outperform a larger basic model.
Ordering based on frame measurements alone, then discovering the actual vent differs from catalogue dimensions, creates problems.
Solution: Where possible, obtain the vent before measuring. Physical comparison between your frame and the actual component eliminates surprises. Many suppliers offer measuring guides specific to their products.
With accurate measurements recorded and your vent size confirmed, you're ready for the hands-on installation work. The next section provides detailed step-by-step instructions covering the complete fitting process from preparation through to final verification.
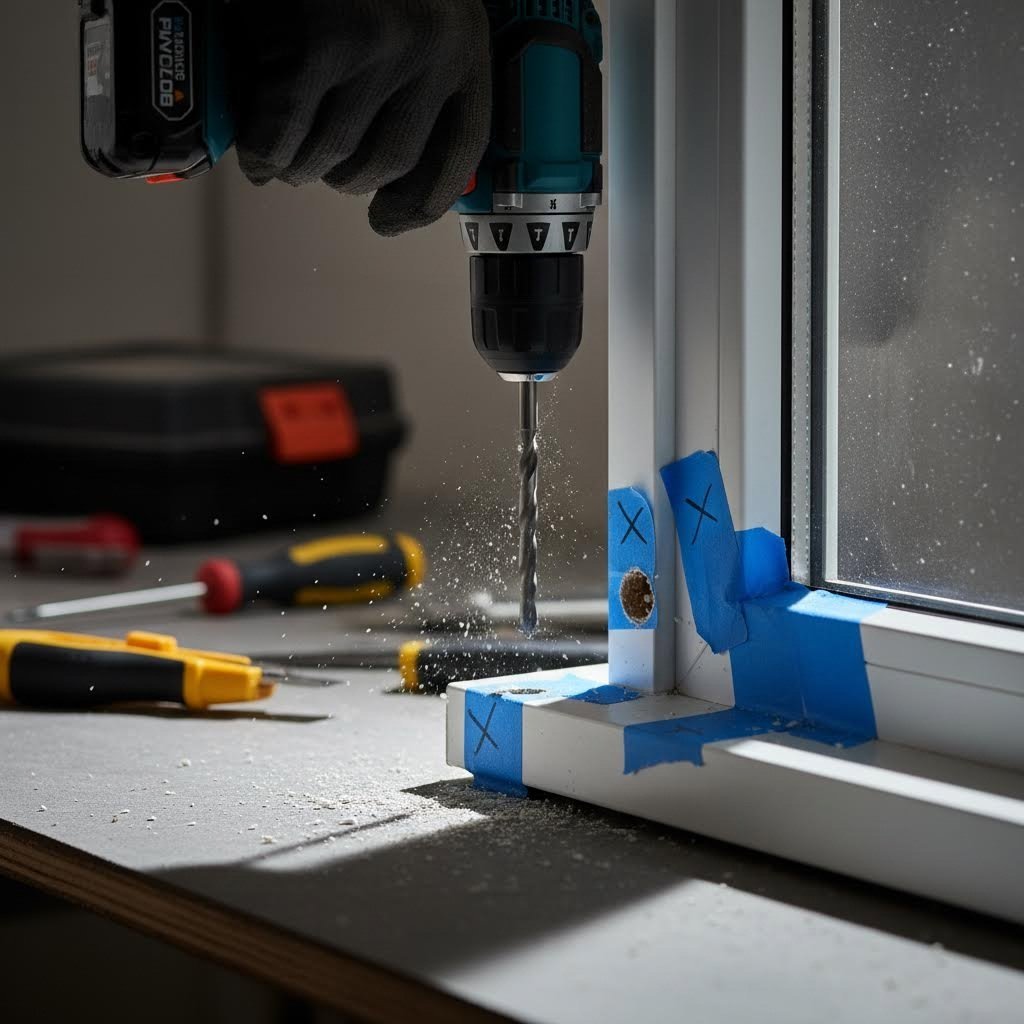
You've measured twice, selected the right components, and understand your frame material. Now comes the moment of truth - actually fitting trickle vents to existing windows. This is where careful preparation pays dividends. Rush this stage, and you risk cracked frames, misaligned holes, or vents that leak air around their edges rather than through them.
The following guide walks you through each phase of the installation, from gathering your tools through to verifying your completed work. Whether you're tackling DIY trickle vent fitting for the first time or refreshing your technique, these detailed instructions ensure professional results.
Before drilling a single hole, gather everything you'll need within arm's reach. Stopping mid-installation to hunt for tools breaks your concentration and increases the chance of errors. Here's what a complete trickle vent installation guide requires:
Don't have every specialist tool? These substitutions work for most domestic installations:
With tools assembled and safety equipment in place, you're ready to begin. This process covers how to install trickle vents on typical through-frame installations - the most common type for residential windows.
This phase requires steady hands and patience. Rushing here causes most installation failures.
Weather protection starts outside, so the external canopy goes on first.
A vent that leaks around its edges defeats the purpose of controlled ventilation. Proper sealing ensures air passes through the vent mechanism, not around it.
Before considering the job complete, verify everything works as intended.
Pro tip: Take photos of your completed installation from both inside and outside. If you're fitting trickle vents to existing windows across multiple rooms, these images help you maintain consistent quality and serve as useful reference for any future maintenance or warranty claims.
With your vent successfully installed and verified, you've completed the core installation work. However, existing vents eventually wear out or require updating. Understanding how to handle replacement scenarios ensures you're prepared for the full lifecycle of your ventilation system.
Even the best-installed trickle vents don't last forever. Over time, plastic components become brittle, adjustment mechanisms seize up, and seals deteriorate. Knowing when to replace rather than repair - and how to match replacement trickle vents for windows correctly - saves both frustration and money. This section covers the complete replacement process, from recognising warning signs through to fitting compatible replacements.
How do you know when your existing vents have reached the end of their useful life? Some indicators are obvious; others require closer inspection. Watch for these common signs that replacement is due:
According to HandleStore, good ventilation is essential for a healthy home, and damaged, clogged, or outdated trickle vents should be replaced promptly to maintain indoor air quality and prevent condensation problems.
Found a vent that needs replacing? The critical challenge is finding a compatible replacement - particularly for older windows where the original manufacturer may have discontinued that product line.
Before shopping for replacements, gather as much information as possible about your current vent:
Careful removal protects your window frame for the new installation. Follow this process:
What happens when your vent is no longer manufactured? This common scenario has several solutions:
Sometimes you need to close off a vent opening rather than replace the vent itself. A trickle vent blanking plate provides a neat solution for several scenarios:
Blanking plates typically consist of internal and external covers that sandwich together through the existing slot, secured with screws. They should include weatherproof seals to prevent draughts and water ingress. When fitting blanking plates, use the same sealant procedures as for vent installation to ensure complete weatherproofing.
With your replacement vent in hand and old components removed, installation follows the same process outlined in the previous chapter. However, pay particular attention to these replacement-specific considerations:
Even with careful installation, problems sometimes arise. The next section addresses common issues that can occur during or after fitting, along with practical solutions to get your ventilation working correctly.
So you've completed your installation - but something isn't quite right. Perhaps cold air whistles through when the vent is closed, or you've noticed condensation forming in unexpected places. Don't worry. Even experienced installers encounter problems, and most trickle vent issues have straightforward solutions once you identify the root cause.
This section tackles the most common trickle vent problems and solutions you're likely to encounter. Whether you're diagnosing an installation you've just completed or investigating issues with existing vents, you'll find practical fixes here - along with guidance on when to call in professional help.
Alignment problems are among the most frequent installation failures. When internal and external components don't line up correctly, airflow becomes restricted, operation feels stiff, and the finished result looks unprofessional. Sizing errors compound these issues - a vent that's too large for your frame or doesn't meet ventilation requirements creates ongoing headaches.
The symptom is obvious: your internal and external canopies don't line up when you look through the vent slots. Air passes through one component but hits solid material on the other side, dramatically reducing ventilation effectiveness.
What causes this? Usually, it's drilling from only one side without adequate pilot holes, or template slippage during marking. The fix depends on severity:
Cut the slot too narrow, and your vent won't seat properly. Too wide, and gaps around the edges compromise weatherproofing. Both scenarios are recoverable:
You've installed your vent successfully, but the equivalent area falls short of Building Regulations requirements for the room. This commonly happens when physical fit is prioritised over EA specifications.
Solutions include:
A trickle vent leaking air around its edges rather than through the controlled opening defeats the entire purpose of installation. Noise problems - whether external sounds entering or the vent itself making noise - are equally frustrating. Let's address both.
According to KJM Group, trickle vents are designed to allow controlled airflow, not wide-open draughts. If you feel significant cold air when the vent is in the closed position, something has gone wrong.
Check these potential causes:
Vent noise falls into two categories: external sounds entering through the vent, and noise generated by the vent itself.
For external noise intrusion:
For vent-generated noise (rattling, whistling, humming):
| Problem | Likely Cause | Solution | Prevention |
|---|---|---|---|
| Vent won't close fully | Paint, debris, or damaged slider mechanism | Clean slider track; replace if mechanism is broken | Protect vents during decorating; clean regularly |
| Trickle vent leaking air around edges | Inadequate sealant or failed weatherproofing | Remove and reseal with fresh silicone | Apply continuous sealant bead before fitting |
| Condensation on internal frame near vent | Cold bridging through vent opening (common in aluminium) | Add thermal break inserts; consult specialist for aluminium frames | Use thermal break solutions during initial installation |
| Water ingress during rain | Missing or damaged external weathershield; incorrect vent orientation | Verify external canopy is correctly fitted with drip edge facing outward | Check orientation before fixing; ensure adequate overhang |
| Restricted airflow despite vent being open | Misaligned slots; blocked insect mesh; debris accumulation | Realign components; clean or replace mesh; vacuum debris | Use templates carefully; maintain regular cleaning schedule |
| Stiff or jammed adjustment | Paint ingress; corrosion; mechanical damage | Clean tracks with mild solvent; replace if mechanism is damaged | Mask vents during painting; operate regularly to prevent seizure |
| Visible gaps between vent and frame | Incorrect sizing; uneven frame surface; insufficient tightening | Apply additional sealant; use packing behind canopy if needed | Measure accurately; test fit before final fixing |
Condensation appearing near your trickle vents can indicate several underlying problems - some related to installation quality, others to how the vent is being used.
If condensation forms on the window frame directly adjacent to the vent, you may be experiencing cold bridging. This is particularly common with aluminium windows, where cutting vent slots allows cold external air to circulate within frame chambers, chilling internal surfaces below dew point. As noted by the Council for Aluminium in Building, this issue has become more prevalent since trickle vents became mandatory.
Condensation inside the room that clears when you open the vent wider suggests your current ventilation level is insufficient for the moisture load. This isn't an installation fault - it's an indication you need either larger vents or additional ventilation capacity.
However, if condensation appears inside the vent mechanism itself or water drips from the internal canopy, the external weathershield may be compromised. Check that:
Most trickle vent problems can be resolved with patience and the right approach. However, certain situations warrant professional intervention:
KJM Group notes that professional installers ensure vents are positioned correctly for optimal airflow and weather sealing - expertise that prevents many common problems from occurring in the first place.
Understanding when to tackle problems yourself versus seeking help leads naturally to a broader question many homeowners face: should you attempt the entire installation as a DIY project, or is professional fitting the wiser choice? The next section helps you make that decision based on your specific circumstances.
You've now seen exactly what trickle vent installation involves - the measuring, drilling, sealing, and troubleshooting. The question facing many homeowners is straightforward: should you tackle this yourself, or hire someone to do it? The answer isn't universal. Your specific window type, skill level, and project scope all influence whether DIY window vent fitting makes sense or whether professional trickle vent installation delivers better value.
Let's break down both approaches so you can make an informed decision that suits your circumstances, budget, and comfort level.
For many homeowners, fitting trickle vents is an achievable weekend project. The tools required are common, the process is logical, and the satisfaction of completing it yourself is genuine. But DIY isn't right for everyone or every situation.
Consider handling the installation yourself if you meet most of these criteria:
Sometimes the smart choice is stepping back and letting experts handle the work. Professional installation isn't about lacking capability - it's about recognising when specialist skills, tools, or certifications add genuine value.
Consider hiring a window ventilation installer near me if any of these factors apply:
Two factors often tip the balance toward professional installation: warranty protection and regulatory compliance.
Warranty implications: Most window manufacturers specify that modifications must be carried out by approved installers to maintain warranty coverage. Drilling into a frame yourself could void your warranty entirely - a significant risk if your windows are relatively new. Before picking up a drill, review your warranty documentation carefully or contact the manufacturer directly.
Building control requirements: Under Building Regulations, window replacements and modifications affecting ventilation may require notification to your local building control body. FENSA-registered installers can self-certify that work complies with regulations, providing you with a certificate that's valuable if you sell your property. DIY installations require you to either apply to building control directly (incurring fees and inspection visits) or accept that the work remains uncertified.
Understanding the true costs helps you weigh your options realistically:
| Cost Element | DIY Approach | Professional Installation |
|---|---|---|
| Trickle vent unit | £15-40 per vent | £15-40 per vent (often included in quote) |
| Labour | £0 (your time) | £50-80 per vent |
| Tools (if not owned) | £30-60 one-time cost | £0 (provided by installer) |
| Building control (if required) | £200-400 application fee | Often included via FENSA certification |
| Workmanship warranty | None | Typically 1-2 years |
| Total per vent (typical) | £15-100 | £80-150 |
For a five-window project, DIY might cost £75-200 total, while professional installation could run £400-750. However, if building control certification is required, the DIY cost advantage shrinks considerably once you factor in application fees and potential inspection visits.
For readers seeking professional-grade solutions that simplify both installation and long-term performance, sourcing quality components makes a significant difference. Manufacturers like Anhui Shengxin Aluminum offer custom window trickle vents featuring patented designs, adjustable airflow control, and seamless integration into uPVC, aluminium, and timber frames.
These customizable passive ventilation solutions are engineered for regulatory compliance from the outset, reducing the risk of failed inspections or inadequate ventilation capacity. When professional installers work with quality components, the entire process - from fitting through to building control certification - runs more smoothly.
Whether you're a contractor seeking reliable supply or a homeowner wanting premium components for a professional installation, exploring manufacturers who specialise in window ventilation hardware ensures you're starting with products designed specifically for this application.
Still unsure which route to take? Ask yourself these questions:
If you answered "yes" to the first two questions and "no" to the warranty and building control questions, DIY is likely viable. Any hesitation on those points suggests professional installation offers better value and peace of mind.
Whichever path you choose, remember that proper installation is only the beginning. Maintaining your trickle vents correctly ensures they continue protecting your home from condensation and poor air quality for years to come.
You've invested time and effort into proper trickle vent window installation - but the work doesn't end when the last screw goes in. Like any mechanical component in your home, trickle vents require ongoing attention to perform at their best. Neglect them, and you'll gradually lose the ventilation benefits you worked so hard to achieve. Maintain them properly, and they'll protect your home from condensation and poor air quality for a decade or more.
This final section covers everything you need to know about keeping your vents working effectively, from simple cleaning routines through to seasonal adjustments that optimise performance year-round.
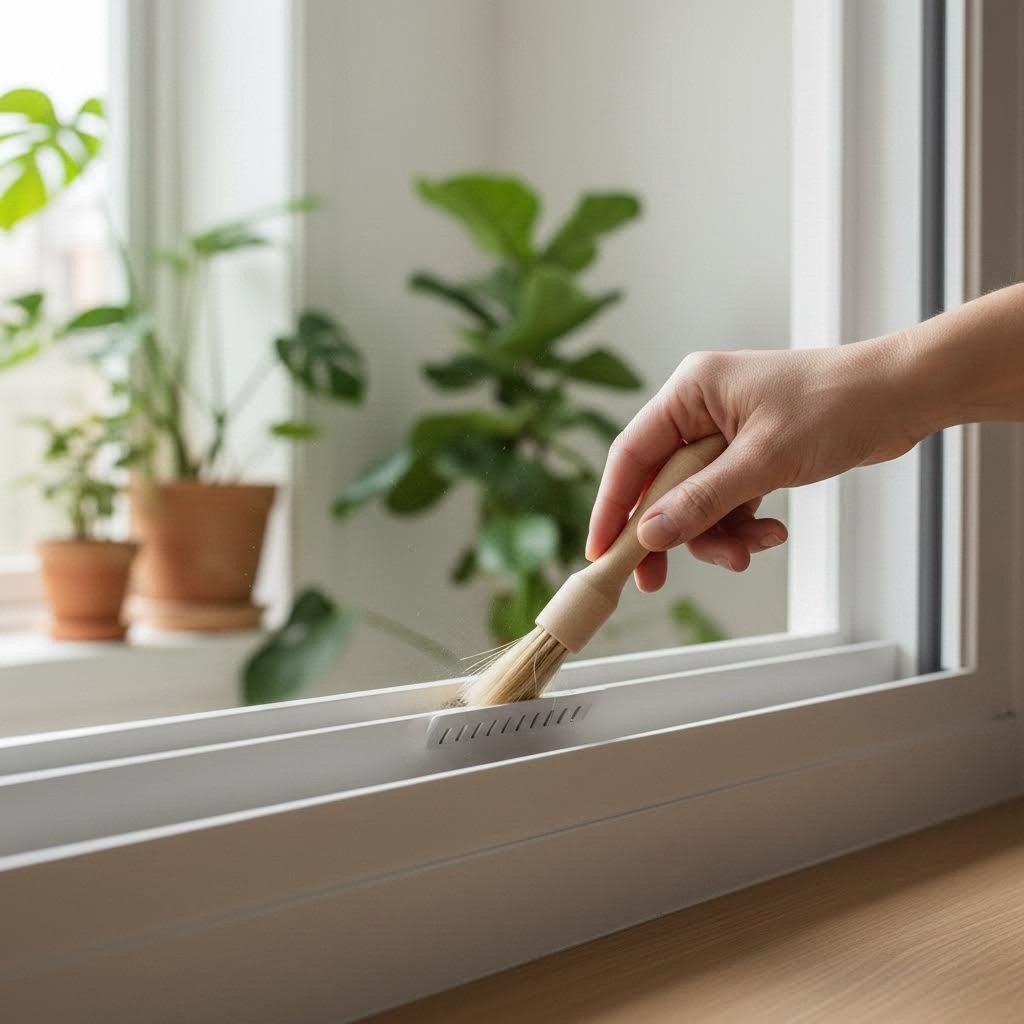
The good news? Trickle vent maintenance is straightforward and requires minimal time. According to the Titon Maintenance Manual, proper care ensures your vents operate correctly throughout their service life - but it must be carried out at regular intervals.
Dust, pollen, and debris accumulate in vent slots over time, restricting airflow and reducing ventilation effectiveness. A simple cleaning routine prevents these blockages from becoming problematic.
For routine cleaning:
After cleaning, always ensure the vent is fully open for proper ventilation before leaving it unattended.
How often should you clean your trickle vents? Stewart Milne Homes recommends cleaning every three months to maintain optimal airflow and prevent blockages. However, your specific environment affects this frequency:
The Titon manual specifically warns that more window and door furniture is damaged by incorrect cleaning than by any other means. When maintaining your trickle vents:
If moving parts need lubrication, use only a small amount of silicone-based lubricant.
Cleaning keeps vents functional, but smart operation maximises their effectiveness throughout the year.
Your ventilation needs change with the seasons. Adjusting vent settings accordingly balances fresh air supply with energy efficiency:
Modern humidity-controlled vents handle these adjustments automatically, opening wider when moisture levels rise and closing during dry conditions.
Annual inspections catch developing problems before they require expensive repairs. Once yearly, check for:
Early detection of problems enables simple repairs rather than complete replacements, saving both time and money.
Proper maintenance extends vent lifespan significantly - but it can't overcome fundamental quality limitations. Vents manufactured to high standards from durable materials simply last longer and perform better than budget alternatives.
Regulatory-compliant vents engineered for durability provide measurable advantages over time. Premium components typically feature UV-stabilised plastics that resist yellowing, robust adjustment mechanisms that withstand years of use, and precision manufacturing that ensures consistent sealing. When you're investing in custom window trickle vents from specialist manufacturers like Anhui Shengxin Aluminum, you're choosing products designed specifically for long-term performance in demanding applications.
The initial cost difference between basic and quality vents is modest, but the long-term value gap is substantial. A premium vent that lasts fifteen years without issues costs far less over its lifetime than a cheap alternative requiring replacement every five years.
As you complete your trickle vent project, remember the factors that determine long-term success:
Take time now to verify your installation meets ventilation standards. Check that your equivalent area calculations satisfy the requirements for each room type. Confirm all seals are intact and adjustment mechanisms operate correctly. Document what you've installed - photographs and specifications prove invaluable for future reference.
Your properly installed and maintained trickle vents will now work quietly in the background, preventing the condensation and mould problems that damage so many UK homes. Fresh air will circulate continuously, improving indoor air quality without compromising energy efficiency. That's the reward for doing the job right - healthy, comfortable living spaces protected from moisture damage for years to come.
Yes, you can retrofit trickle vents to existing windows. For uPVC frames, through-frame vents require drilling slots into the frame head, while over-frame vents mount on top without major modifications. The process involves measuring frame depth, marking drill positions, creating ventilation holes, and securing both internal and external canopy components. However, ensure your frame has adequate depth (minimum 25mm for most vents) and avoid steel reinforcement when drilling. For properties with condensation issues, adding trickle vents alongside extractor fans provides comprehensive moisture control.
Trickle vent installation costs vary between DIY and professional approaches. DIY installation typically costs £15-50 per vent for materials alone, including the vent unit, sealant, and any required drill bits. Professional installation ranges from £80-150 per vent, which includes labour, materials, and often FENSA certification for Building Regulations compliance. For a five-window project, expect £75-200 for DIY versus £400-750 for professional fitting. Custom vents from specialist manufacturers like Anhui Shengxin Aluminum may cost slightly more but offer patented designs and adjustable airflow control for better long-term value.
Trickle vents have several potential drawbacks to consider. Improper installation can allow vehicle exhaust or outdoor pollutants to enter your home. The openings may permit insects if mesh covers are damaged or missing. Aluminium frames present thermal bridging risks where cold air circulates within frame chambers, potentially causing condensation on internal surfaces. Standard vents may allow noise intrusion in noisy locations, though acoustic-rated alternatives address this. Additionally, blocked or poorly maintained vents lose effectiveness over time, requiring regular cleaning every 3-4 months to maintain optimal airflow.
Installing a trickle vent involves several key steps. First, measure your frame depth, headroom, and available width, then mark drill positions using the manufacturer's template. Apply masking tape to protect the frame surface. Create pilot holes from inside, then drill main ventilation holes (typically 8-10mm diameter) through to the external face. Remove burrs and clear debris from the holes. Apply silicone sealant around the external opening, position and secure the external canopy with screws, then install the internal canopy with its adjustable slider facing into the room. Test the mechanism operates smoothly before considering the job complete.
Trickle vents can meet Building Regulations Part F when correctly specified and installed. The regulations require minimum equivalent area (EA) for different rooms: 8,000mm² for living rooms, bedrooms, and kitchens in multi-storey dwellings (10,000mm² for single-storey), and 4,000mm² for bathrooms. All background ventilators must be installed at least 1,700mm above floor level. When replacing windows, ventilation capacity must match or exceed the original. FENSA-registered installers can self-certify compliance, while DIY installations may require separate building control approval. Properties with MVHR systems should not have trickle vents fitted.


 online service
 0086 136 3563 2360
 sales@sxalu.com
 +86 136 3563 2360
 English
 français
 Deutsch
 русский
 español
 português
 العربية
 ไทย
ไทย Việt
Việt Українська