
Have you ever walked into a room and immediately felt the air was heavy, stale, or just uncomfortable? That stuffy sensation often signals a ventilation problem. A window air vent offers a simple yet effective solution, allowing fresh outdoor air to flow into your living space while pushing stale indoor air out, all without the hum of mechanical systems or a spike in your electricity bill.
Window ventilation systems are integrated openings or add-on devices designed specifically for continuous air exchange through your windows. Unlike opening a window fully, which can invite noise, insects, and security concerns, vented windows provide controlled airflow. They work quietly in the background, maintaining a steady supply of fresh air while keeping your home comfortable and protected.
So how does air actually move through your home without fans pushing it along? The answer lies in two natural forces: wind and buoyancy.
Wind-driven ventilation occurs when outdoor breezes create pressure differences around your building. When wind hits one side of your home, it creates positive pressure, pushing air through any available openings. On the opposite side, negative pressure draws air out. This pressure differential naturally moves air through your living space.
Buoyancy-driven ventilation, sometimes called the stack effect, relies on temperature differences. Warm indoor air is lighter and rises, escaping through higher openings. This creates a gentle vacuum that pulls cooler, denser outdoor air in through lower openings. Imagine your home as a breathing organism, constantly exchanging air as temperatures shift throughout the day.
Vent windows capitalize on these natural forces. Positioned strategically, they allow air to enter low and exit high, creating a continuous flow without any energy consumption. Traditional wing windows in older vehicles worked on similar principles, using angled panes to direct airflow into the cabin. Modern residential window vents apply this same physics to keep your indoor environment fresh.
You might wonder why ventilation matters so much. Consider this: the air inside your home can be significantly more polluted than outdoor air, according to building science research. Without adequate air exchange, indoor pollutants accumulate, creating an environment that can affect your health and comfort.
Poor ventilation leads to several problems:
The National Center for Healthy Housing recommends maintaining indoor relative humidity between 30-60% to prevent these issues. A window air vent provides one of the simplest ways to achieve this balance, offering continuous background ventilation that keeps moisture and pollutants from reaching problematic levels.
When considering how to improve your home's air quality, you'll encounter several ventilation options. How do window vents compare to alternatives like mechanical exhaust systems or duct window configurations connected to HVAC equipment?
Mechanical ventilation uses fans and ductwork to force air movement. While effective and controllable, these systems consume electricity, require regular maintenance, and can generate noise. They excel in extreme climates where natural ventilation alone cannot maintain comfort.
Opening windows fully provides excellent air exchange but sacrifices security, weather protection, and noise control. It also depends entirely on occupants remembering to open and close windows appropriately.
Window air vents occupy the middle ground, offering passive operation with consistent performance. Here are the key benefits that make them an attractive choice for many homeowners:
For many homes, especially those in mild climates or those seeking to supplement existing mechanical systems, a window air vent provides an elegant, low-maintenance solution. The technology works with your home's natural airflow patterns rather than fighting against them, creating a healthier indoor environment without complexity or ongoing costs.

Now that you understand why ventilation matters, the next question becomes: which type of window vent is right for your situation? Not all vents are created equal, and choosing the wrong one can leave you with inadequate airflow or unnecessary expense. Let's explore the major categories of window vents so you can make an informed decision for your specific needs.
Imagine a ventilation window solution so subtle you barely notice it's there. That's exactly what trickle vents deliver. These slim, slot-style openings integrate directly into window frames or glass units, providing constant low-level airflow without dramatically changing your window's appearance.
Trickle vents typically measure between 250mm and 400mm in length, with narrow profiles that sit flush against the window frame. They work by allowing small amounts of air to pass through continuously, maintaining what building scientists call "background ventilation." This steady air exchange prevents the buildup of moisture and stale air that occurs in tightly sealed modern homes.
You'll find trickle vents particularly valuable in:
The beauty of trickle vents lies in their simplicity. Once installed, they require minimal attention and provide years of reliable service. Many models include closable flaps for those rare occasions when you want to reduce airflow completely.
Some spaces generate so much moisture and odor that passive trickle ventilation cannot keep up. Kitchens producing steam from cooking and bathrooms filled with shower humidity need more aggressive solutions. This is where window exhaust vents shine.
A window exhaust vent actively removes contaminated air from your space rather than simply allowing air exchange. These units typically include small fans that pull air outward, creating negative pressure that draws fresh air in through other openings. The window exhaust approach works especially well when you cannot install traditional ducted exhaust systems.
Key applications for exhaust-style window vents include:
While these vents do consume electricity, their targeted extraction capability makes them invaluable in high-moisture environments where passive options fall short.
What if you want the best of both worlds: continuous ventilation when you need it and the ability to reduce airflow during extreme weather? Adjustable window vents put you in control.
These systems range from simple manual sliders to sophisticated humidity-sensing units. Manual versions feature adjustable louvers or sliding covers that let you regulate airflow from fully open to completely closed. You might open them wide during mild spring days and restrict them during winter cold snaps.
Automatic controllable vents take convenience further. Some respond to indoor humidity levels, opening wider when moisture builds up and closing when conditions normalize. Others integrate with home automation systems, adjusting based on occupancy, outdoor air quality, or time of day.
Consider adjustable window vents when:
Window ventilation extends far beyond residential applications. Specialty vents serve unique purposes in automotive, commercial, and industrial settings where standard solutions fall short.
Automotive vents have evolved significantly over the decades. Older vehicles featured smoker windows, those small triangular panes near the front windows that pivoted open to direct airflow. Modern automotive vents take different forms, including in-channel rain guards that allow windows to remain slightly open during rain without water intrusion. These automotive vents provide cabin ventilation while maintaining weather protection.
Commercial applications demand different characteristics. Office buildings require window vents that balance natural ventilation with noise control and security. Factories and warehouses need high-capacity solutions capable of handling industrial heat loads and air quality challenges. Healthcare facilities require vents meeting strict hygiene standards while providing adequate patient comfort.
Specialty window vents also serve specific purposes like:
Choosing between window vent options can feel overwhelming. The following comparison table summarizes the key characteristics of each type, helping you quickly identify which suits your situation:
| Type | Best Application | Airflow Control | Installation Complexity | Typical Cost Range |
|---|---|---|---|---|
| Trickle Vents | Bedrooms, living rooms, general residential | Fixed or manually adjustable | Low to moderate (DIY possible) | $15–$50 per unit |
| Window Exhaust Vents | Kitchens, bathrooms, workshops | Fan-powered, adjustable speed | Moderate (electrical required) | $50–$200 per unit |
| Adjustable Manual Vents | Variable-use spaces, seasonal climates | Fully adjustable via sliders or louvers | Low to moderate (DIY possible) | $25–$75 per unit |
| Automatic/Smart Vents | Whole-home systems, high-tech installations | Sensor-driven or programmable | Moderate to high (may need professional) | $100–$400 per unit |
| Automotive/Specialty Vents | Vehicles, commercial, industrial spaces | Varies by application | Varies widely | $20–$500+ depending on application |
When selecting a window vent, consider your primary ventilation goal. Are you addressing general stuffiness throughout your home? Trickle vents offer the simplest solution. Fighting bathroom mold or kitchen odors? A window exhaust vent delivers targeted extraction. Need flexibility for changing conditions? Adjustable systems provide that control.
Understanding these options prepares you for the next important decision: what materials should your window vents be made from? Material choice affects durability, performance, and long-term satisfaction with your ventilation investment.
You've identified the type of window vent that fits your needs, but here's a question many homeowners overlook: what should that vent be made of? The material composition of your ventilation panel directly affects how long it lasts, how well it performs, and whether it can withstand your local climate conditions. Choosing the wrong material means premature replacement, degraded performance, or ongoing maintenance headaches.
Let's break down the three primary material categories so you can match your window vent insert to your home's specific demands.
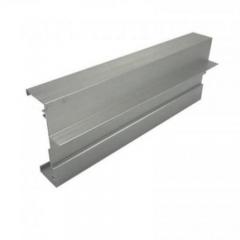
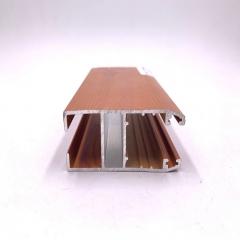
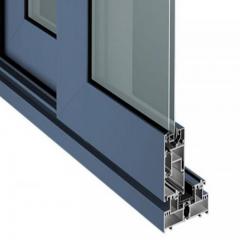
When durability and weather resistance top your priority list, aluminum emerges as the go-to choice. This lightweight metal has earned its reputation in window ventilation for good reason: it simply refuses to rust.
Unlike iron or steel, aluminum naturally forms a protective oxide layer when exposed to air and moisture. This invisible shield prevents corrosion from penetrating the metal, making aluminum window vent covers exceptionally long-lasting in challenging environments. Homes in humid or coastal regions particularly benefit from this corrosion resistance, as salt-laden air quickly degrades lesser materials.
Aluminum also offers excellent structural stability. Despite being lighter than steel, it maintains its shape and rigidity over years of use. This means your venting windows won't warp, sag, or develop gaps that compromise airflow or allow water intrusion.
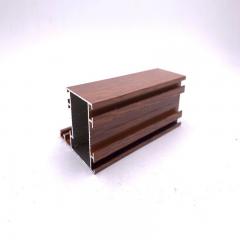
Budget-conscious homeowners often gravitate toward plastic and PVC window vents. These polymer-based options deliver respectable performance at a fraction of the cost of metal alternatives.
PVC, or unplasticized polyvinyl chloride (uPVC), has become increasingly popular in window applications. According to industry sources, uPVC doesn't absorb moisture, which means it won't swell, twist, or develop mold over time. This moisture resistance makes plastic vents suitable for bathrooms and other humid spaces where wood would deteriorate.
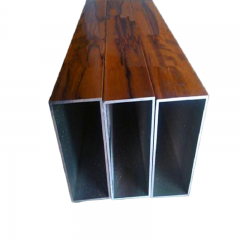
Modern plastic vents have improved significantly in durability and appearance. Many now feature UV stabilizers that prevent yellowing and brittleness from sun exposure. Some manufacturers even offer plastic window vent covers with wood-grain textures that mimic natural materials at lower cost.
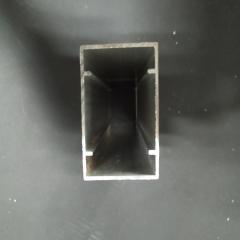
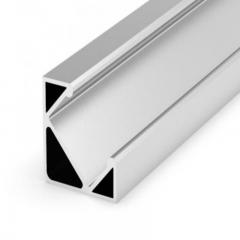
When heavy-duty performance matters more than cost, steel and specialty metal vents deliver unmatched strength. Commercial buildings, industrial facilities, and high-security applications often require these robust options.
Steel window vents handle abuse that would damage aluminum or plastic. They resist impact, support heavier components, and maintain their integrity under extreme conditions. This makes them popular for workshops, warehouses, and areas where equipment or materials might contact the ventilation system.
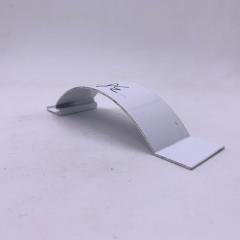
Specialty metals like stainless steel or galvanized steel add corrosion resistance to steel's inherent strength. These treatments protect against rust while maintaining structural advantages. A window air scoop made from stainless steel, for example, can direct substantial airflow while withstanding harsh industrial environments.
Your local weather patterns should heavily influence material selection. A window air scoop that performs beautifully in Arizona may fail miserably in Florida or Minnesota. Consider these climate-specific guidelines:
Humid climates: Prioritize corrosion-resistant materials like aluminum or PVC. High moisture levels accelerate rust on unprotected steel and can cause issues even with some coated metals. Aluminum's natural oxide protection makes it particularly well-suited to these conditions.
Cold climates: Look for materials with thermal break features or naturally low conductivity. Standard aluminum and steel conduct cold into your home, potentially causing condensation and frost on interior surfaces. PVC or aluminum with thermal breaks prevents this heat transfer.
Hot climates: Demand UV-stable construction. Intense sunlight degrades many plastics, causing brittleness and color fading. Choose UV-stabilized PVC or naturally UV-resistant metals. Also consider materials that allow maximum airflow capacity, as passive ventilation becomes more critical when temperatures climb.
Understanding these material characteristics prepares you for the practical question most homeowners face next: where exactly should you install window vents in different rooms of your house?
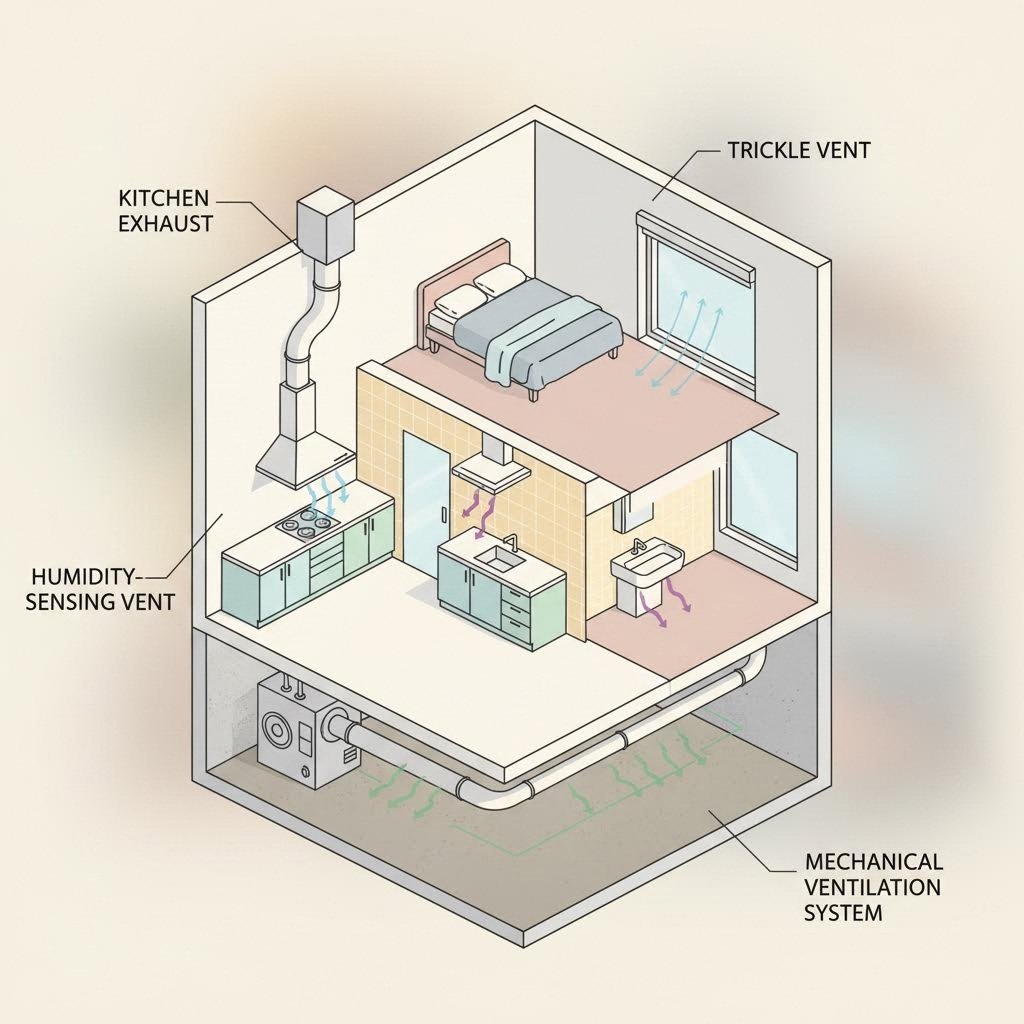
Every room in your home has unique ventilation demands. A bathroom fighting humidity needs different solutions than a bedroom seeking fresh sleeping air. Understanding these room-specific requirements helps you select the right window ventilation system for each space rather than applying a one-size-fits-all approach that leaves some areas underserved.
Let's walk through your home room by room, examining what each space needs and which solutions deliver the best results.
Your kitchen generates more airborne contaminants than any other room in your house. Think about what happens when you cook: steam rises from boiling pots, grease particles become airborne from frying, and odors from various ingredients permeate the air. Without adequate ventilation, these contaminants settle on surfaces, create sticky residue, and spread throughout your home.
The challenge intensifies if you have a vent hood in front of window placement that limits your exhaust options. Many older homes and apartment layouts position cooking areas near windows without traditional ducted exhaust routes. In these situations, a window air exhaust vent becomes essential.
Effective kitchen ventilation should address:
For kitchens, prioritize window exhaust vents with fan assistance over passive trickle vents. The volume and nature of contaminants demands active extraction. Look for units with washable grease filters that capture particles before they enter the fan mechanism.
If moisture had a favorite room, it would be your bathroom. Hot showers, running baths, and even handwashing release substantial water vapor into a typically small, enclosed space. This creates ideal conditions for mold and mildew, which thrive on warm, moist surfaces.
Controlling bathroom humidity requires a multi-pronged approach. While mechanical exhaust fans remain the gold standard, window vents provide valuable supplementary ventilation, especially in bathrooms lacking ceiling exhaust capability.
Consider these humidity control strategies:
For bathrooms, humidity-sensing automatic vents offer particular value. These units open wider when moisture levels spike during showers and reduce airflow when conditions normalize. This responsive operation provides protection without constant manual adjustment.
You spend roughly one-third of your life sleeping, making bedroom air quality remarkably important. Unlike kitchens and bathrooms where moisture and odors demand aggressive extraction, bedrooms benefit from gentle, continuous fresh air supply that doesn't create drafts or noise.
Overnight, each sleeping person exhales carbon dioxide and moisture. In a sealed room, CO2 levels gradually rise while oxygen decreases, potentially affecting sleep quality. Proper window vents in house sleeping areas maintain healthy air composition throughout the night.
Living spaces face different challenges. These high-occupancy areas accumulate CO2 from breathing, volatile organic compounds from furniture and electronics, and dust from activity. Extended gatherings can rapidly degrade air quality without adequate ventilation.
For bedrooms and living rooms, trickle vents excel. Their low-profile design and quiet operation avoid the disturbances that would interfere with sleep or conversation. Adjustable models let you increase airflow during warmer months or when hosting guests, then reduce it during cold weather.
Basements present unique ventilation challenges that surface-level rooms don't face. Positioned below grade and surrounded by concrete, these spaces naturally struggle with poor airflow, high humidity, and stagnant conditions that create musty odors and potential health concerns.
Common basement air problems include:
A basement window vent kit provides a starting point for improving conditions. However, many basements benefit from more robust solutions like ductless energy recovery ventilators (ERVs) that provide balanced ventilation without extensive ductwork installation.
Many homeowners attempt to manage basement air issues with dehumidifiers or by cracking windows. While helpful, these methods don't replace stale air with fresh outdoor air. In winter, opening a window simply dumps cold air into the space without improving quality. A proper house window vents strategy for basements combines moisture control with active air exchange.
The following table summarizes recommended ventilation approaches for each room type, helping you quickly identify appropriate solutions based on your specific situation:
| Room Type | Recommended Vent Type | Suggested Airflow Rate | Key Considerations |
|---|---|---|---|
| Kitchen | Window exhaust vent with fan | 50-100 CFM minimum | Grease filtration, heat resistance, proximity to cooking area |
| Bathroom | Exhaust vent or humidity-sensing automatic | 50-80 CFM | Moisture extraction, mold prevention, quiet operation |
| Bedroom | Trickle vent or adjustable passive | 15-30 CFM | Noise minimization, draft prevention, overnight operation |
| Living Room | Trickle vent or adjustable passive | 20-40 CFM | Occupancy capacity, aesthetic integration, seasonal adjustment |
| Basement | Exhaust vent or ERV system | 30-70+ CFM depending on size | Humidity control, radon dilution, temperature management |
| Utility Room | Window exhaust vent | 50-100 CFM | Dryer moisture, water heater combustion air, appliance heat |
How do you determine the right amount of airflow for a specific room? While professional assessments provide the most accurate guidance, you can estimate basic requirements using room volume and occupancy patterns.
Start by calculating your room's volume: multiply length by width by ceiling height. Building codes typically recommend complete air changes per hour (ACH) based on room function. Kitchens and bathrooms generally need 8-15 air changes per hour during active use, while bedrooms and living spaces require 4-8 ACH.
Consider occupancy patterns as well. A bedroom occupied only at night has different needs than a home office used 10 hours daily. Rooms with multiple regular occupants need more ventilation than single-occupant spaces.
With your room-specific requirements identified, the next logical step is understanding how to actually install these ventilation solutions, which brings us to practical DIY guidance.

Ready to tackle your own window ventilation kit installation? Good news: most homeowners can successfully install trickle vents in under an hour per window with basic tools and careful preparation. This hands-on approach saves money on contractor fees while giving you complete control over placement and timing.
However, installation success depends entirely on proper preparation and following the correct sequence. Rushing through steps or skipping safety considerations leads to problems ranging from air leaks to damaged window frames. Let's walk through everything you need to know before picking up your tools.
Before starting any window duct installation, gather your materials and assess your workspace. Having everything ready prevents frustrating mid-project trips to the hardware store and ensures you can complete the job in one session.
Here's what you'll need for a standard trickle vent installation:
| Tools Required | Materials Needed |
|---|---|
| Light pencil | Trickle vent kit (internal and external components) |
| Ruler or measuring tape | Screws (typically included with kit) |
| Screwdriver (Phillips or flathead depending on kit) | Screw cover caps |
| Drill with appropriate bit (if pre-drilling required) | Weatherproof sealant or caulk |
| Level | Cleaning cloth |
| Safety glasses | Denatured alcohol for surface prep |
Preparation steps matter as much as the tools themselves. Start by cleaning the window frame thoroughly, removing any dust, debris, or old paint that might interfere with proper seating. Use denatured alcohol to wipe down the installation area, ensuring adhesives and sealants bond correctly.
Check your window's condition before proceeding. Rotted wood frames, cracked vinyl, or corroded aluminum may require repair before adding ventilation components. Installing a window duct kit into compromised framing creates ongoing problems that worsen over time.
Safety first: Always wear safety glasses when drilling or working near glass. Ensure your ladder or step stool sits on stable, level ground if working on upper-floor windows. Never lean excessively to reach difficult areas, and move your ladder instead of overextending your reach.
Trickle vents represent the most common DIY window ventilation project. These slot-style vents integrate into window frames, providing continuous background airflow without requiring electrical connections or complex window ducting modifications.
Follow these steps carefully for a professional-quality installation:
A beautifully installed window vent that leaks air or water around its edges defeats the entire purpose. Proper sealing ensures your ventilation system performs as intended without creating new problems.
Start by examining the junction between vent components and the window frame. Any visible gaps require attention. Apply a bead of weatherproof silicone sealant along edges where the vent meets the frame, using a caulking gun held at a 45-degree angle. Smooth the bead with a putty knife or wet finger before it sets.
Key weatherproofing considerations include:
If you're installing a window exhaust kit with a powered fan component, weatherproofing becomes even more critical. The penetration through the window for electrical connections or ducting requires careful sealing to prevent water intrusion.
Critical warning: Never compromise your window's structural integrity to accommodate a vent. If installation requires cutting through load-bearing frame members or removing significant material, stop and consult a professional. Weakened window frames can fail during high winds or under snow loads, creating serious safety hazards.
DIY installation works well for straightforward trickle vent projects on standard windows in good condition. However, certain situations demand professional expertise. Recognizing these scenarios before you start saves frustration, prevents damage, and ensures safe, code-compliant results.
Consider professional installation when:
Professional window vent installation typically costs between $80-150 per vent including labor and parts. While this exceeds DIY material costs of $15-50 per unit, professional installation provides peace of mind, warranty protection, and guaranteed results.
Once your window vents are installed, whether by your own hands or a professional's, the next important consideration is ensuring you've selected the right size and specifications for your specific spaces and climate conditions.
You've identified the right type and material for your window air vents, but here's where many homeowners stumble: choosing the correct size. A vent that's too small leaves you with inadequate airflow, while one that's oversized can create uncomfortable drafts and energy waste. Getting this balance right requires understanding some basic calculations and matching specifications to your specific conditions.
Don't worry if numbers aren't your strong suit. We'll break down the technical aspects into practical guidance you can apply directly to your home.
Ever wondered how ventilation professionals determine how much air a room actually needs? The answer lies in a measurement called CFM, or cubic feet per minute. This figure represents the volume of air that should move through your space to maintain healthy conditions.
The International Mechanical Code (IMC) establishes baseline ventilation requirements that inform local building codes across the United States. According to these standards, outdoor airflow rates depend on both occupancy and floor area. For residential spaces, the formula combines a per-person rate with a per-square-foot rate to determine total requirements.
Here's how window air ventilation needs typically break down:
For a practical example, imagine a 150-square-foot bedroom typically occupied by one person. The calculation would include roughly 5 CFM for the occupant plus 9 CFM for the floor area (150 × 0.06), totaling approximately 14 CFM of required outdoor airflow.
Natural ventilation through window vents can satisfy these requirements when properly sized. The IMC specifies that natural ventilation openings must equal at least 4% of the floor area being ventilated. For that same 150-square-foot bedroom, you'd need at least 6 square feet of openable ventilation area.
Once you understand your airflow requirements, the next challenge becomes fitting appropriate vents into your existing windows. This involves both practical measurements and aesthetic considerations.
Proportional sizing matters for several reasons. An air ventilation window solution that overwhelms the frame looks awkward and may compromise the window's structural integrity. Conversely, a tiny vent on a large window appears as an afterthought and likely won't deliver adequate performance.
Consider these proportional guidelines when selecting window air vents:
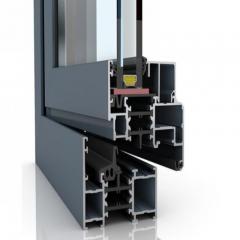
Window frame material also affects sizing decisions. As noted in WindowMaster's natural ventilation guidelines, window openings in facades should typically measure 400-600 millimeters in height, with widths around 1.2-1.4 meters optimal for single-actuator operation. Wider windows may require multiple vent units or dual-point systems to maintain proper function.
Don't forget about clearance requirements. Inward-opening vents need sufficient space between the vent top and ceiling to achieve full opening. Outward-opening designs require clearance from exterior obstacles like overhangs or landscaping.
Your local climate dramatically influences which ventilator window specifications will perform best. A vent perfectly suited for mild California weather might fail miserably in humid Florida or frigid Minnesota. Let's examine how different climate conditions should shape your selection.
Humid climates present constant moisture challenges. High outdoor humidity means incoming ventilation air carries substantial water vapor. Your window air circulation strategy must account for this by:
Cold climates demand attention to thermal performance and draft prevention. When outdoor temperatures plunge, even small ventilation openings can create uncomfortable cold spots and significant energy losses. Address these concerns by:
Hot climates require maximum airflow capacity to take advantage of natural cooling opportunities. When temperatures allow, abundant ventilation can reduce or eliminate air conditioning needs. Optimize for hot weather by:
The following table consolidates sizing recommendations based on typical room sizes and uses. Use these guidelines as starting points, adjusting based on your specific climate conditions and occupancy patterns:
| Room Size Category | Floor Area Range | Recommended Minimum Vent Area | Suggested CFM Capacity | Typical Vent Dimensions |
|---|---|---|---|---|
| Small (bathroom, closet) | Up to 75 sq ft | 3 sq ft (4% of floor) | 25-50 CFM | 250-300mm length trickle vent |
| Medium (bedroom, office) | 75-200 sq ft | 3-8 sq ft | 30-75 CFM | 300-400mm length or dual units |
| Large (living room, master suite) | 200-400 sq ft | 8-16 sq ft | 50-100 CFM | Multiple 400mm units or exhaust system |
| Extra Large (great room, open plan) | 400+ sq ft | 16+ sq ft | 100+ CFM | Multiple units across several windows |
Before finalizing your window vent selection, verify compliance with applicable building codes. Requirements vary significantly by region, building type, and construction date.
According to Aire-Renaissance's building code overview, general ventilation requirements are outlined by national standards including the International Building Code (IBC) and ASHRAE Standard 62.1 for commercial buildings and 62.2 for residential buildings. These standards establish minimum ventilation rates, intake location requirements, and opening protection specifications.
Key regulatory considerations include:
Local jurisdictions may impose additional requirements based on climate zones, seismic activity, or regional air quality concerns. Always check with your local building department before installing window vents, especially for new construction or major renovations that require permits.
Some areas with specific environmental challenges have unique requirements. Hurricane-prone regions may require hurricane-rated louvers meeting AMCA 550 standards. High-humidity zones might mandate specific moisture control features. Flood hazard areas require intake openings at or above designated flood elevations.
With proper sizing selected and code compliance confirmed, your final consideration is establishing maintenance routines that keep your window vents performing optimally for years to come.

You've invested time and effort into selecting and installing the right window ventilation system. Now comes the question many homeowners forget to ask: how do you keep it working properly year after year? A vent window that's neglected gradually loses effectiveness, leaving you with the same stuffy air problems you originally set out to solve.
The good news? Window vent maintenance requires minimal effort when done consistently. A few simple routines prevent the buildup of problems that lead to costly repairs or premature replacement windows with vents.
Dust, pollen, and airborne particles constantly flow through your ventilation system. Over time, this debris accumulates on vent surfaces, screens, and any filter components, gradually restricting airflow. Regular cleaning prevents this buildup from reaching problematic levels.
For most windows vents, a quarterly cleaning schedule works well. However, homes in dusty areas, those with pets, or properties near construction may need monthly attention. Here's an effective cleaning approach:
Seasonal deep cleaning should coincide with your spring and fall maintenance routines. This timing catches any buildup before peak heating or cooling seasons when your ventilation needs increase.
Even well-maintained vents occasionally develop issues. Recognizing problems early and understanding their causes helps you address them before they worsen or damage surrounding structures.
Reduced airflow ranks as the most common complaint. When you notice your vent window isn't delivering the same fresh air volume it once did, investigate these potential causes:
Unusual noises typically indicate mechanical issues or improper installation. Whistling sounds suggest air forcing through gaps too small for the pressure differential. Rattling often means loose components vibrating in the airstream. Grinding noises from powered exhaust vents signal motor or bearing problems requiring immediate attention.
Condensation problems frustrate many homeowners, especially during temperature transitions. According to Taylor's Windows, condensation occurs when warm, moisture-laden indoor air contacts cooler surfaces. If your vents consistently show moisture accumulation, consider whether humidity levels in your home exceed the recommended 30-50% range. Improving overall ventilation or using a dehumidifier often resolves persistent condensation issues.
Your ventilation needs shift dramatically between seasons. The settings that keep you comfortable during mild spring weather would create uncomfortable drafts in January or prove inadequate during August humidity. Adjusting your windows with vents for seasonal conditions maximizes comfort while maintaining energy efficiency.
Winter adjustments: Cold weather demands reduced ventilation openings to prevent heat loss while still maintaining air quality. According to HVAC maintenance experts, sealing leaks and ensuring proper insulation should accompany any ventilation adjustments. For adjustable vents, reduce openings to their minimum effective setting. Close any optional vents in unoccupied rooms. Check weatherstripping around vent edges for deterioration that allows uncontrolled air leakage.
Summer adjustments: Warm months call for maximum airflow capacity, especially during cooler morning and evening hours when natural ventilation can supplement or replace mechanical cooling. Open adjustable vents fully, clean any accumulated spring pollen from screens, and consider adding vents to rooms that feel stuffy despite existing ventilation.
Transition seasons: Spring and fall offer ideal opportunities for vent maintenance and adjustment. Moderate temperatures mean less energy penalty from open vents, making this the perfect time for deep cleaning and functional testing.
Keep this reference list handy for regular maintenance sessions:
Not every problem requires purchasing replacement vent windows. Understanding which issues warrant repair versus replacement helps you avoid unnecessary expenses while ensuring your ventilation system actually functions properly.
Repair makes sense when:
Replacement becomes necessary when:
When evaluating replacement, consider whether your original vent selection still matches your needs. Room usage changes, climate shifts, and evolving building codes might make this an opportunity to upgrade rather than simply replace in kind.
With consistent maintenance practices in place, your window ventilation system will deliver years of reliable performance. The final step in your ventilation journey involves making informed decisions about your overall strategy and taking action on any improvements your assessment reveals.
You've now explored the complete landscape of window ventilation, from understanding passive airflow principles to selecting materials, sizing vents properly, and establishing maintenance routines. But knowledge without action leaves you exactly where you started: with stuffy rooms and stale air. This final section brings everything together into a practical decision-making framework you can apply immediately.
Think of this as your ventilating window roadmap. Whether you're addressing a single problem room or planning a whole-home ventilation upgrade, these steps guide you from assessment through implementation to lasting results.
Before purchasing any ventilator for window installation or scheduling contractor visits, take time to honestly assess what you're working with. Many homeowners skip this step and end up solving the wrong problem or over-investing in solutions they don't actually need.
Start with a room-by-room walkthrough using your senses as diagnostic tools:
Document your findings for each room. Note which spaces have existing vents, whether those vents function properly, and any obvious deficiencies. This assessment becomes your prioritization guide, directing attention and resources where they'll deliver the greatest improvement.
Consider also how your home's construction affects ventilation needs. Modern, tightly-sealed homes often require mechanical assistance that older, naturally drafty houses might not need. According to Building America Solution Center guidance, homes with natural air change rates below 0.35 air changes per hour benefit significantly from additional mechanical ventilation to decrease pollutant concentrations.
Don't forget to evaluate your existing equipment. That bathroom exhaust fan installed decades ago may look functional but deliver only a fraction of its rated airflow due to accumulated dust, failing motors, or obstructed ductwork. Testing existing equipment performance reveals whether you need new installations or simply repairs to what you already have.
With your assessment complete, you're ready to select ventilation products that match your specific needs. This is where quality truly matters. A cheap vent that fails within two years costs more than a premium product that lasts a decade when you factor in replacement labor and the frustration of repeated problems.
Prioritize these characteristics when evaluating window ventilator options:
For homeowners seeking venting window solutions that combine these qualities, Anhui Shengxin Aluminum's custom window trickle vents exemplify the engineering approach that delivers lasting results. Their patented designs specifically address moisture buildup and mold prevention while maintaining energy efficiency through thoughtful thermal considerations. The customizable passive ventilation solutions adapt to various window frame configurations, ensuring proper fit regardless of your existing window types.
Similar to how automotive manufacturers developed windscreen vent solutions that balance airflow with weather protection in vehicles, modern residential vents incorporate comparable engineering sophistication. This attention to detail separates products that perform reliably for years from those that disappoint within months.
When comparing options, request performance specifications rather than relying solely on marketing claims. Legitimate manufacturers provide airflow ratings, material specifications, and installation requirements that help you make informed comparisons.
Analysis paralysis stops many homeowners from ever improving their indoor air quality. Don't let perfect become the enemy of good. Start with the highest-priority improvements your assessment identified, then expand your efforts as time and budget allow.
Follow this prioritized action sequence to systematically upgrade your window ventilation:
Remember that ventilation improvement is an ongoing process, not a one-time project. As your home's usage changes, as family size fluctuates, and as seasons shift, your ventilation needs evolve. The assessment skills and product knowledge you've gained through this guide equip you to adapt your approach over time.
Taking even the first step, whether that's cleaning an existing vent, installing a single trickle vent in your stuffiest bedroom, or scheduling a professional consultation for a comprehensive upgrade, moves you toward the fresher, healthier indoor environment you deserve. Your home should be a haven, not a source of discomfort or health concerns. Proper window ventilation makes that possible.
Yes, window air vents are essential for maintaining healthy indoor air quality, especially in modern, tightly-sealed homes. Trickle vents provide continuous background ventilation that prevents moisture buildup, reduces condensation, and stops mold growth without compromising security or energy efficiency. Building regulations in many regions now require trickle vents when replacing windows to ensure adequate fresh air circulation.
Modern window vents are designed to improve air quality without creating uncomfortable drafts. Trickle vents allow controlled, low-level airflow that circulates fresh air while minimizing heat loss. Many models feature adjustable controls so you can reduce airflow during cold weather. Products with thermal break features prevent cold transfer through the frame, maintaining comfort year-round.
The most common window vents are called trickle vents, which are slim, slot-style openings integrated into window frames for continuous background ventilation. Other types include window exhaust vents with fans for kitchens and bathrooms, adjustable louver vents for variable airflow control, and specialty vents for vehicles and commercial applications. Each type serves different ventilation needs based on room function and moisture levels.
Calculate your ventilation needs based on room size and function. Building codes typically require natural ventilation openings equal to at least 4% of floor area. For a 150-square-foot bedroom, this means approximately 6 square feet of openable ventilation. Consider occupancy patterns, moisture sources, and climate conditions when sizing. Trickle vents should span 60-80% of window frame width for balanced airflow and appearance.
Most homeowners can successfully install trickle vents as a DIY project using basic tools like a screwdriver, drill, measuring tape, and level. Installation typically takes under an hour per window. However, powered exhaust vents requiring electrical connections should involve a licensed electrician. Professional installation is also recommended for historic windows, damaged frames, or when building code compliance is required.


 online service
 0086 136 3563 2360
 sales@sxalu.com
 +86 136 3563 2360
 English
 français
 Deutsch
 русский
 español
 português
 العربية
 ไทย
ไทย Việt
Việt Українська